Many organization prefers that printers are automatically configured to user computer when they log in. And this can be achieved using GPO (Group Policy object). In this article, we will install the print server roles, deploy the printers and assign them to the user using GPO.
Table of Contents
Install Print Server Roles
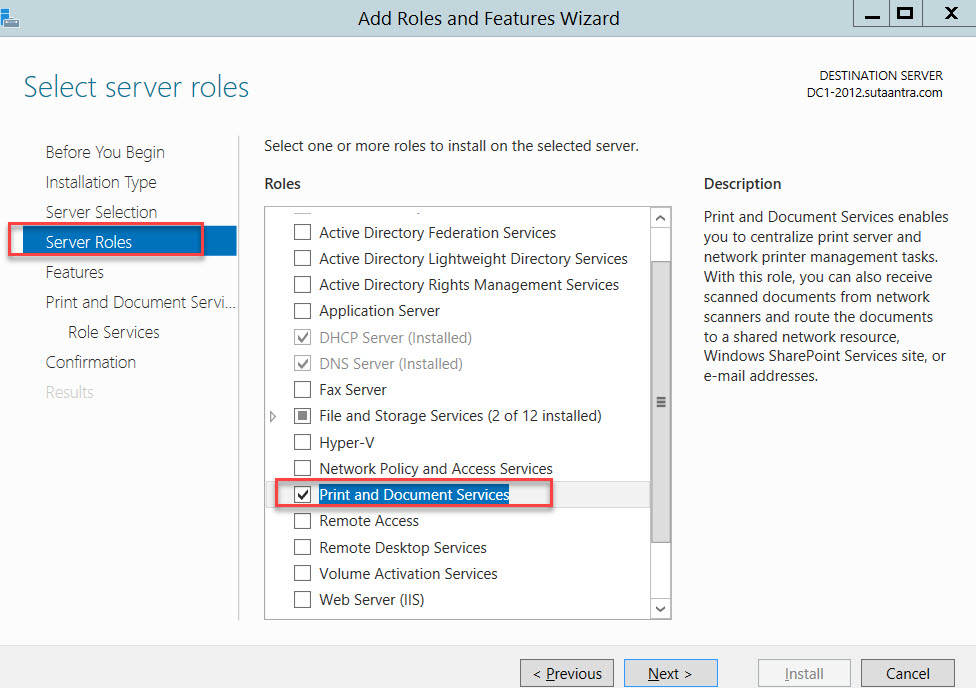
As the first step, we will install the Print server Role. To do that, open Server Manager and choose Manage. From there we will follow the wizard and install the “Print and Document Services”
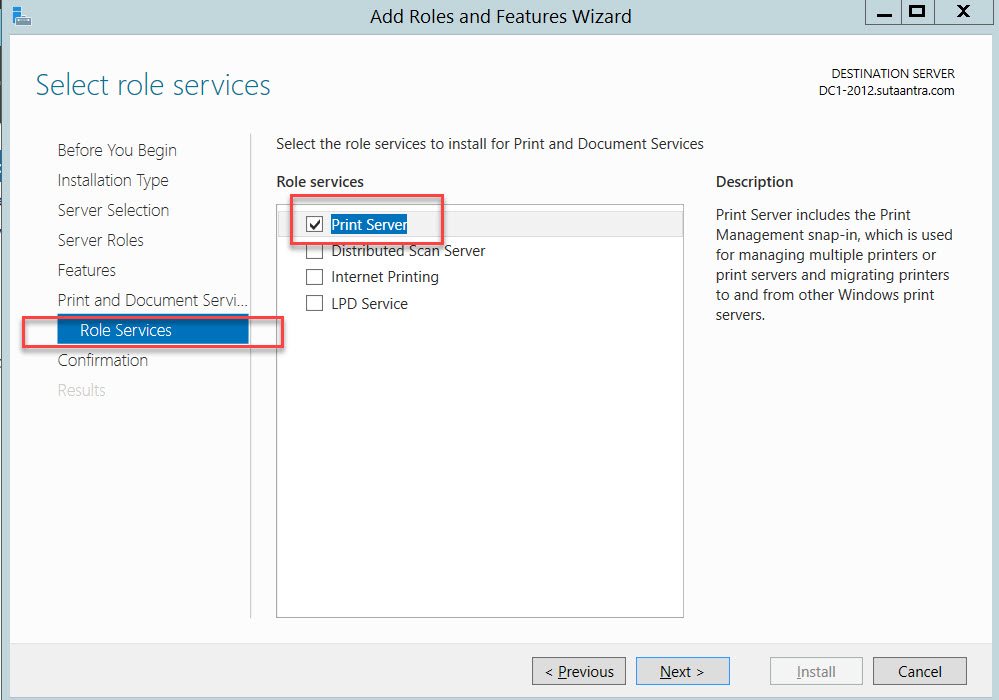
Under Role Services, we will choose the print server option and complete the installation. This role does not need a restart.
Configuring the Print Server – Driver installation
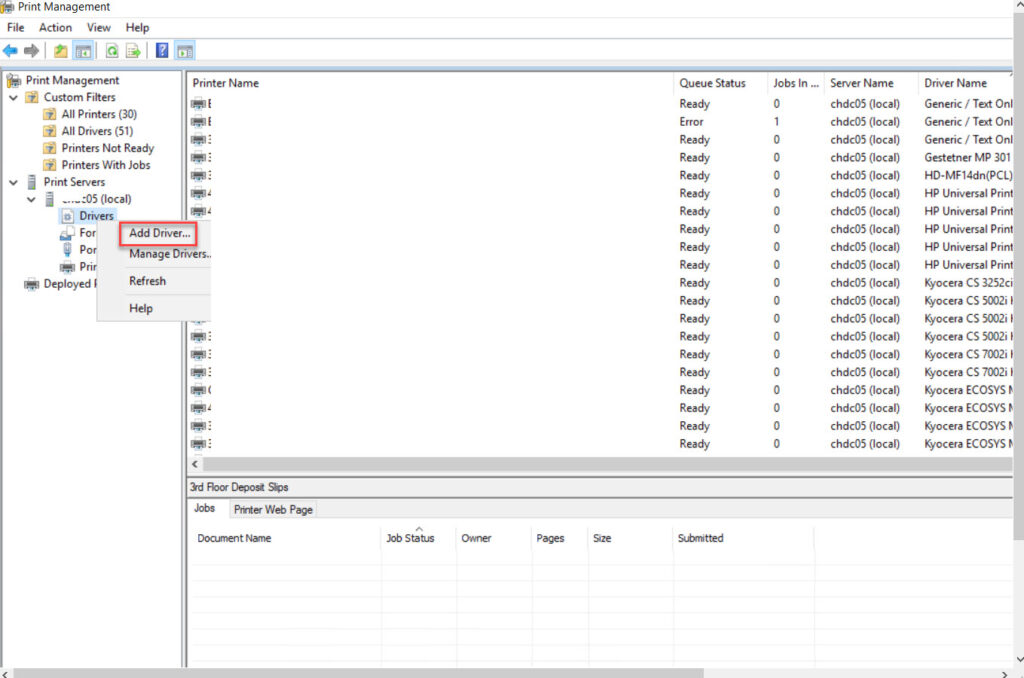
In the next step, we will install the driver. The print server comes with universal drivers for most brands. However, if we need need to install any additional driver we can do that from the print management console. The console can be opened from administrative tools or running the command printmanagement.msc.
Right-click on the driver under Print Server and add drivers and follow the wizard.
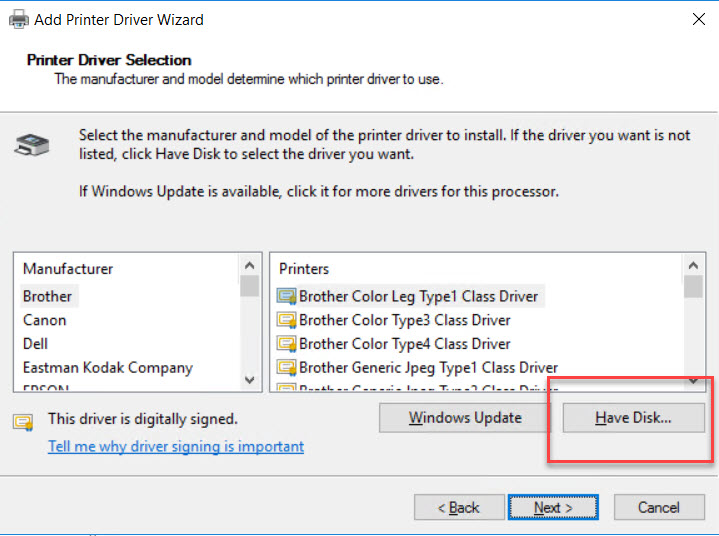
Choose the appropriate option or add downloaded drivers from the company website.
Configuring the Print Server – Printer Add
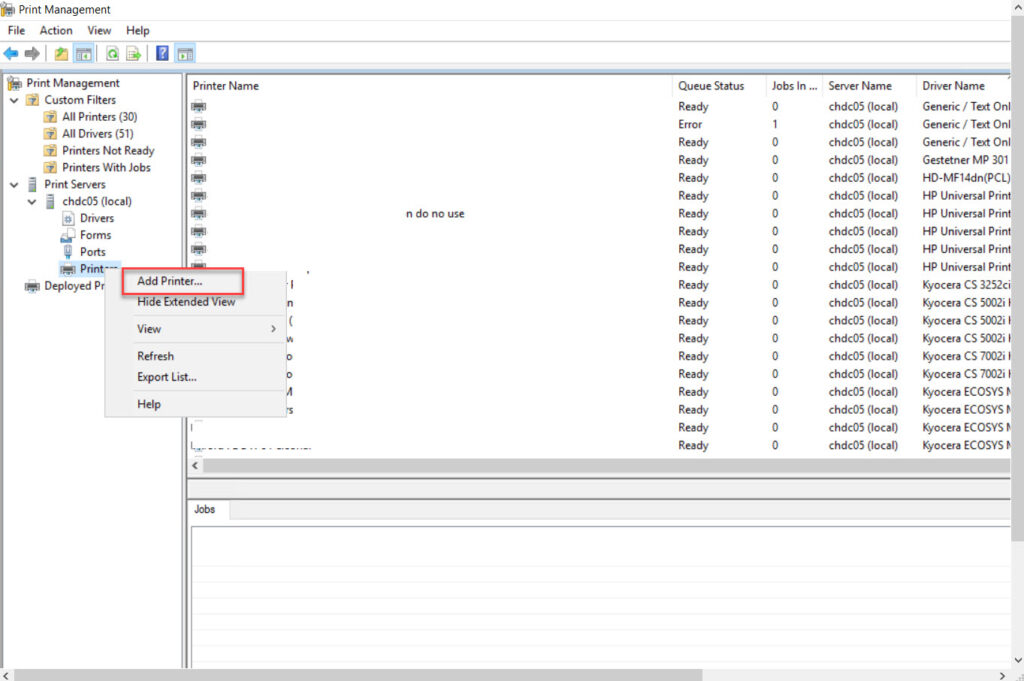
Now we will add the printer to the server. Right-click on the printer under Print Server and add follow the wizard.
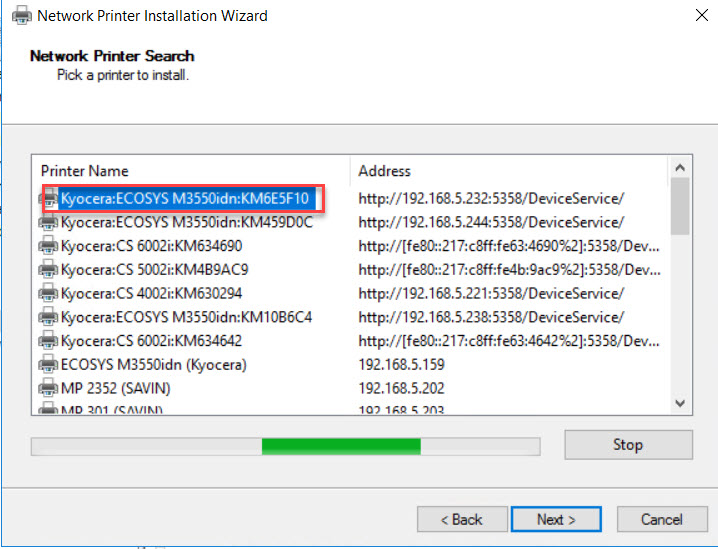
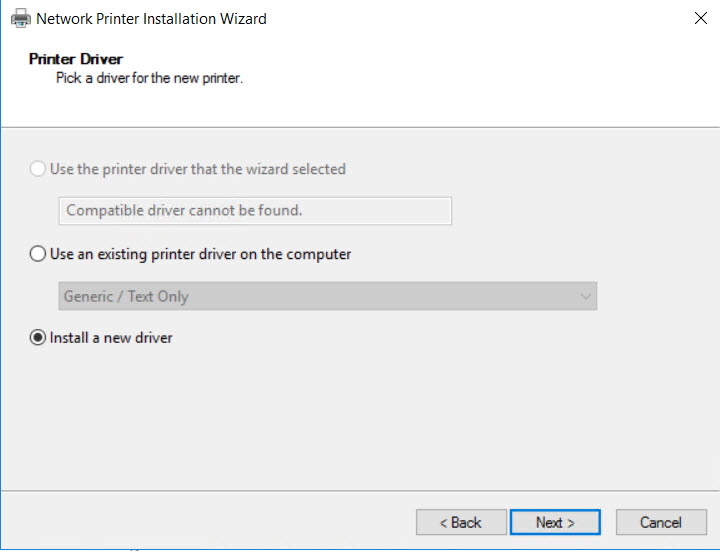
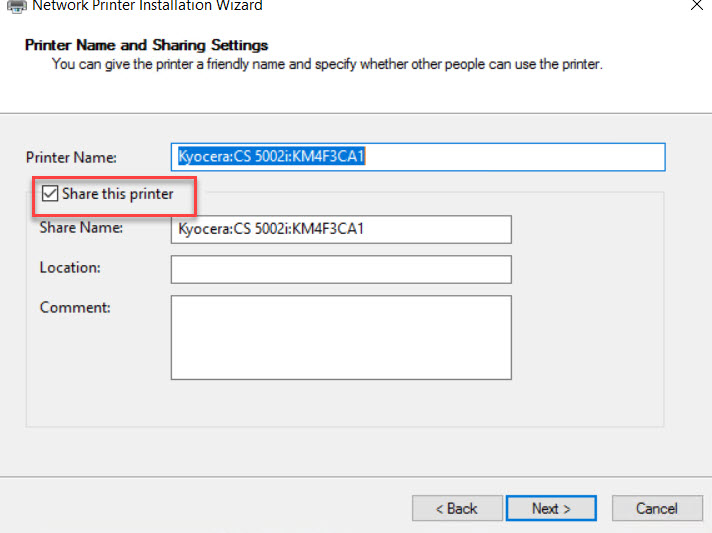
Choose the printer and appropriate driver if not already installed, share the printer and complete the addition.
Deploy using GPO
I’m assuming the GPO is already created, if not you can follow the article here on how to create group policy.
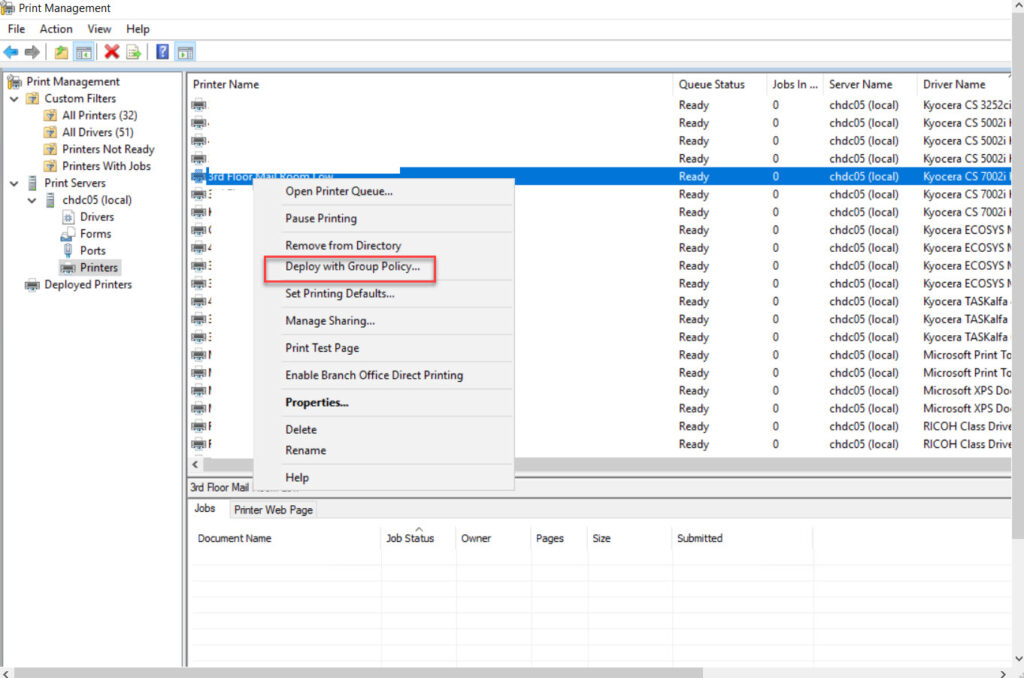
Right-click on the printer and choose to deploy using GPO.
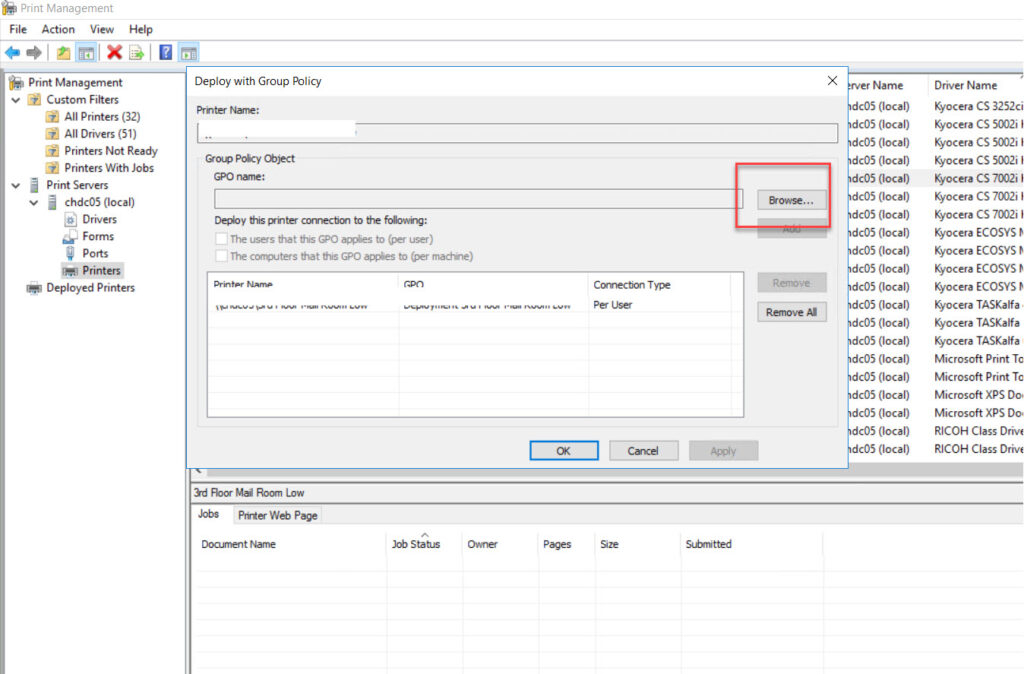
Browse the GPO and apply.
- KB170104


