Gmail supports both POP and IMAP. In this article, we will configure a Gmail account on Outlook with IMAP. The process will be the same for Gsuite also.
Table of Contents
What is the difference between POP and IMAP?
POP and IMAP are different protocols for accessing emails. POP stands for Post Office Protocol and it works by downloading emails from the server to the device and then deleting it from the server. To download and access those emails we will need an email client like Outlook. IMAP Stands for Internet Message Access Protocol where the message resides on the server and can be accessed from multiple devices all synchronized.
Settings of Gmail
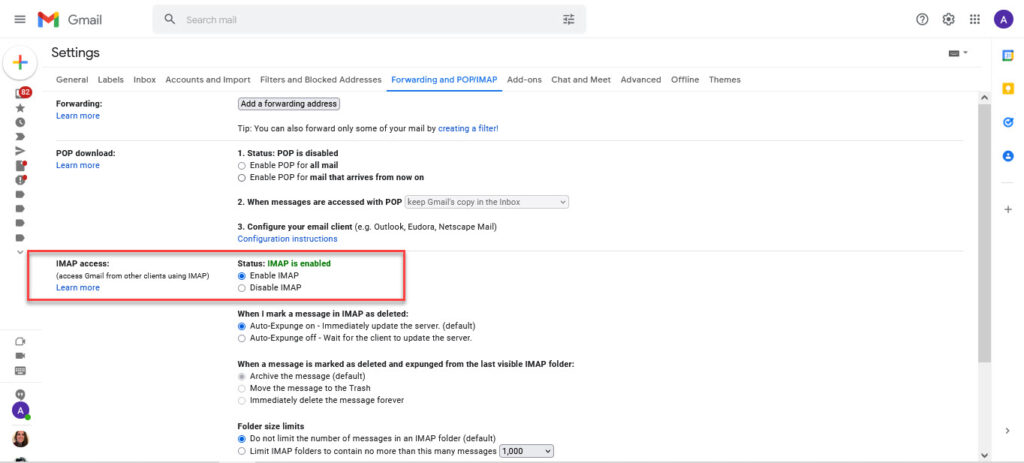
IMAP is enabled by default in Gmail. To check the settings, Click the button with a gear icon in the upper-right corner of the window and choose – see all settings. Navigate to Forwarding and POP/IMAP. The setting should look like this below.
Setting up Outlook in 2013 and older with 2FA
In Outlook 2013 and older the set-up needs to be done manually and also it doesn’t support 2-factor authentication. So as the First step we will set up the app password in Gmail which we will use instead of the regular password & 2FA for login.
Setting up App password in Gmail
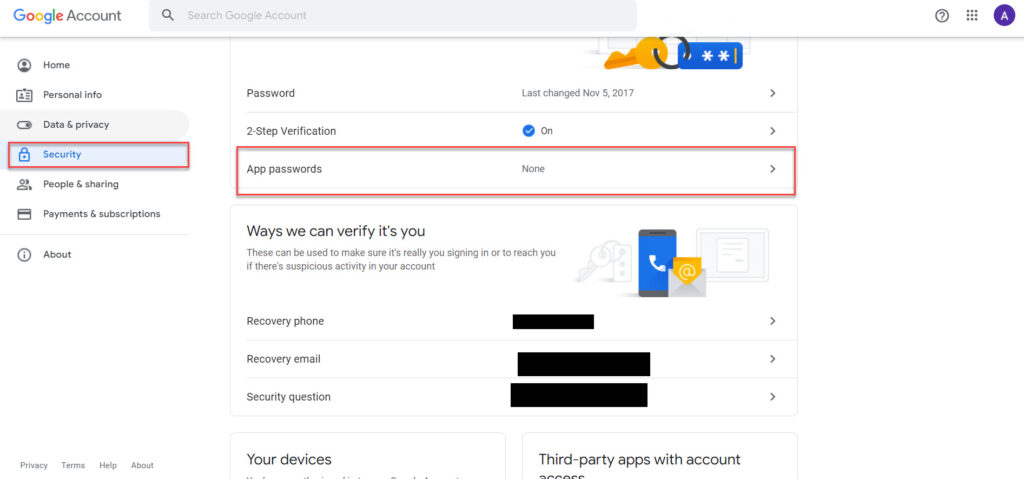
2. Then navigate to the security option and click App Password, and verify the login.
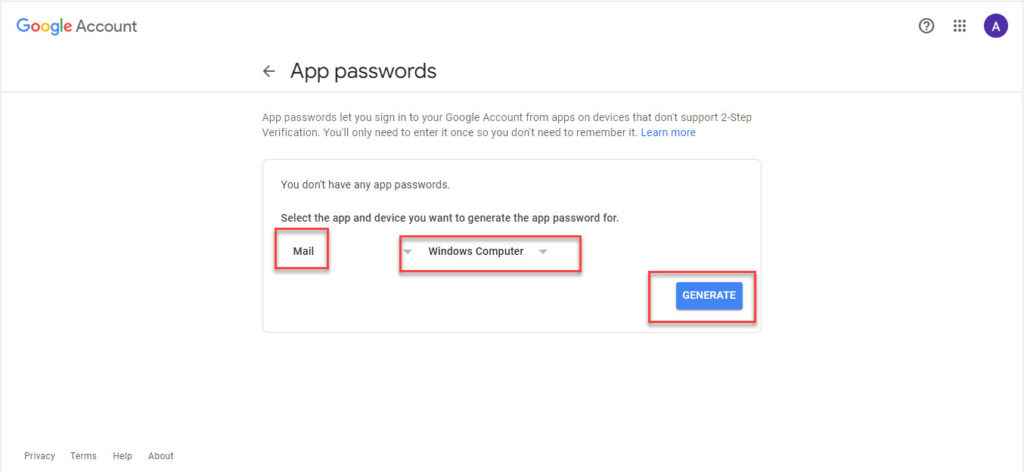
3. Then choose Mail and Windows Computer and generate the password.
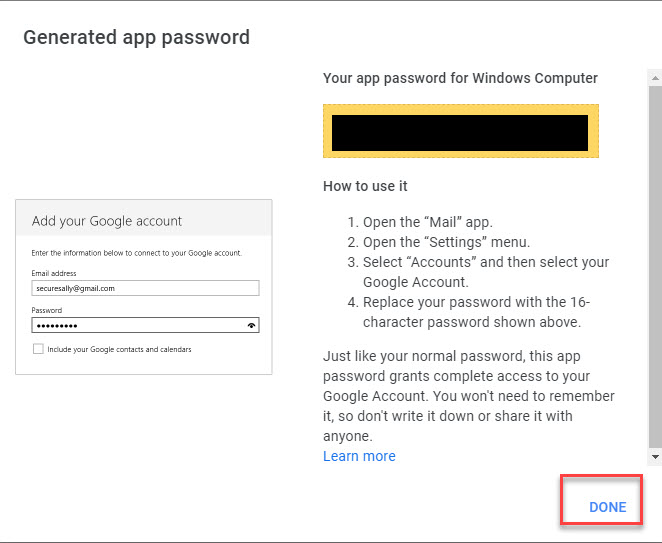
4. Copy the app password and click done.
Setting up Outlook 2013
1. On the outlook, Click File > Add Account.
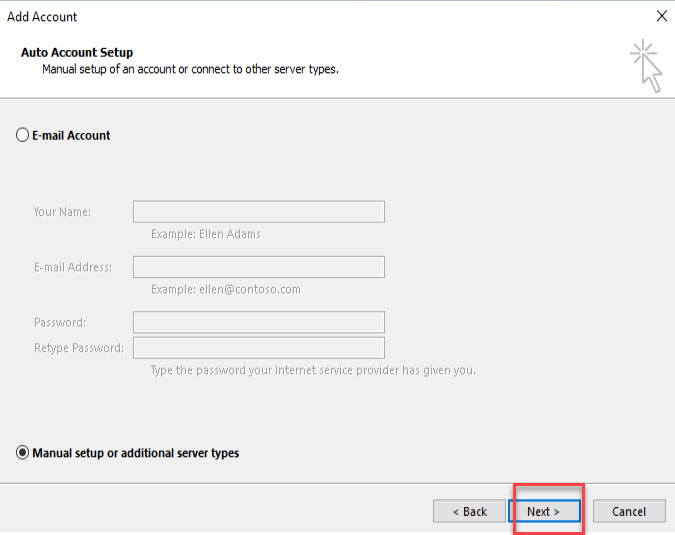
2. On the next windows choose to set up my account manually.
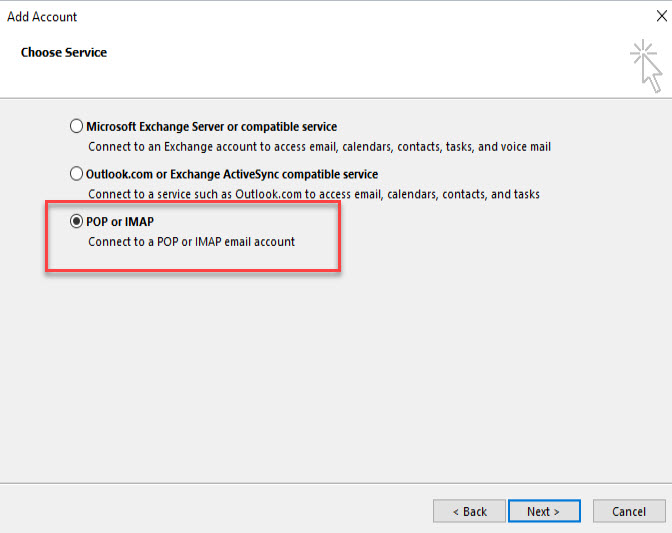
3. Next Choose POP or IMAP
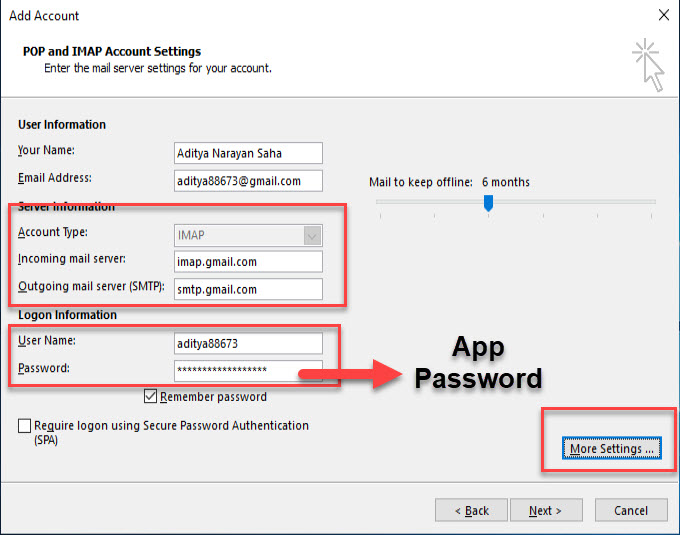
4. In the next pop-up fill up the details with name, email address, user name, and app password. Other settings below and click on more settings
Account Type: IMAP
Incoming mail server: imap.gmail.com
Outgoing mail server (SMTP): smtp.gmail.com
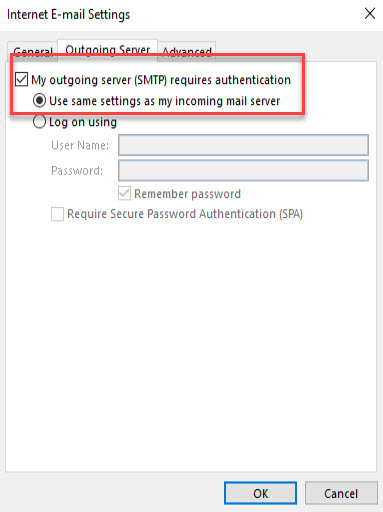
5. In the new pop-up, under the Outgoing Server tab, checkmark – My outgoing server (SMTP) requires authentication option with -Use same settings as my incoming mail server
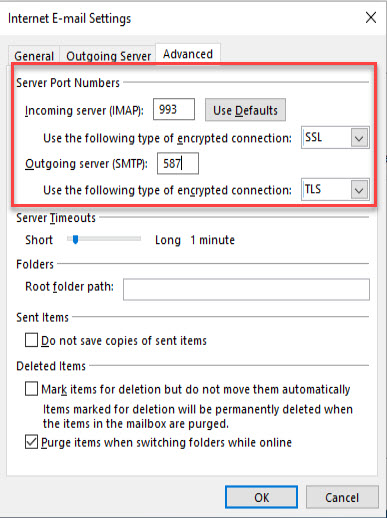
6. In the Advanced tab the following options:
IMAP-993-SSL
SMTP-587-TLS
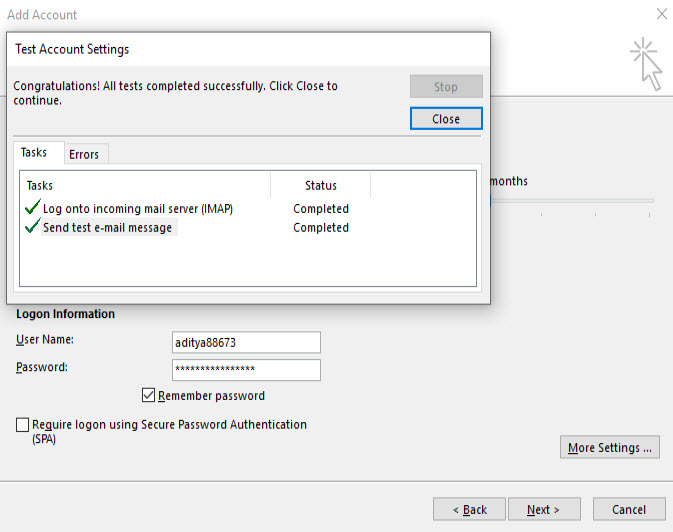
7. In the next step, the config will be verified and done
Setting up Outlook with the newer version of Outlook – MS365
All the newer versions of outlook support 2FA and setting up is easy and pretty straightforward.
1. On the outlook, Click File > Add Account.
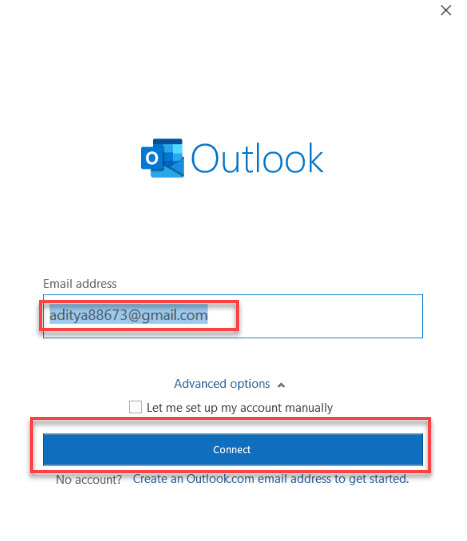
2. Type the email address and it will automatically detect the settings.
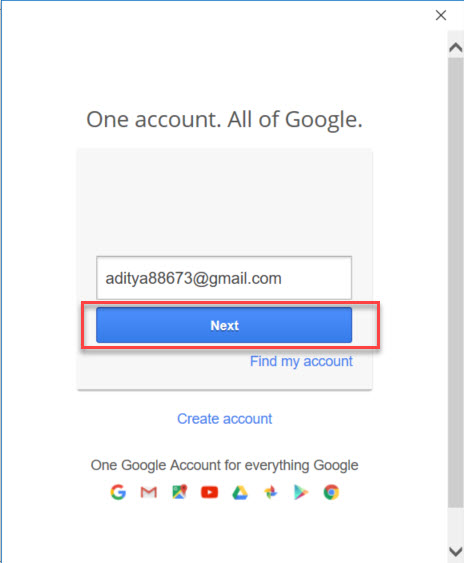
3. Click Next
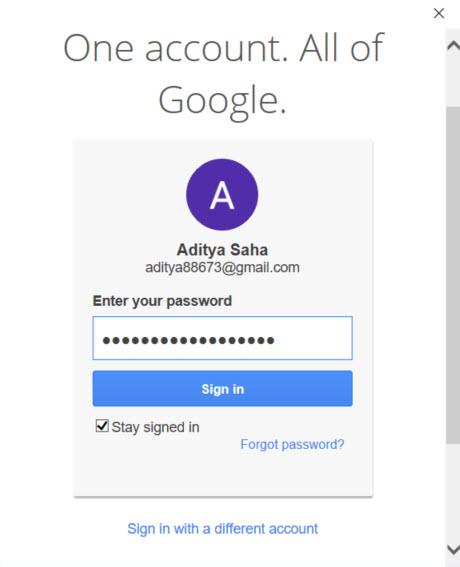
4. Type the password and click sign in
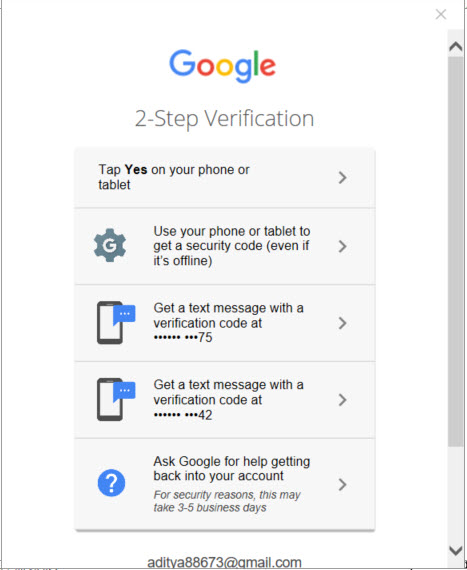
5. Complete the 2-step verification and done.
- KB170106


