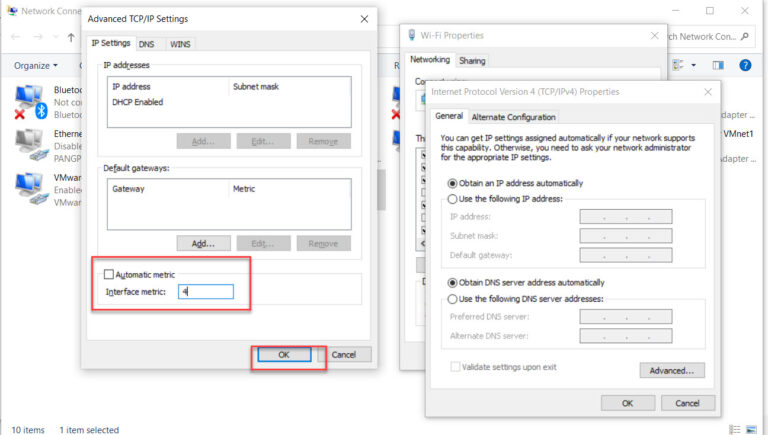
If you are using a Windows 10 computer and if your device has both Ethernet and Wi-Fi adapter then Windows automatically assigns an interface metric value, based on which priority of the adapter is set. This means the interface metric decides what will be the primary connection for network traffic. The lower the interface metric value, the higher is the priority.
By default, ethernet has a higher priority or lowest interface value and is always preferred for network traffic. This is true for all types of Windows computers be it 7,8,10,11.
Sometimes a situation may arise when we want to use wifi when both wifi and ethernet adapter is connected. In that case, we need to set the interface metric value of the wifi adapter lower than that of the ethernet adapter.
In this Windows 10 article, we will change the network adapter priorities so that wifi is preferred over ethernet.
Change network adapter priorities using Powershell
To change the priorities using Powershell do the following:
1. Open Windows Powershell and run as an administrator.
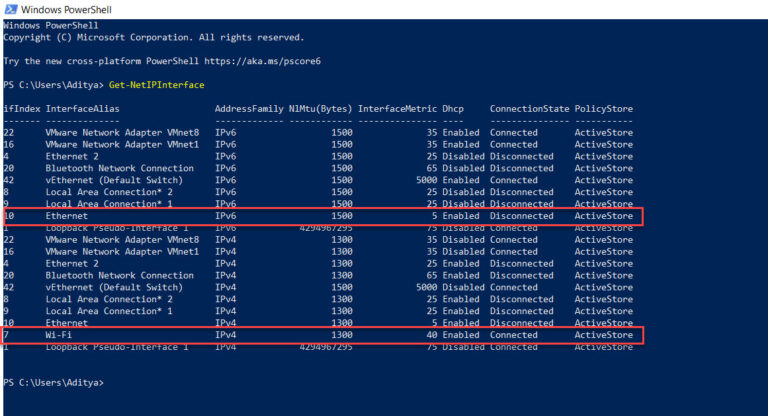
2. Run the below command to get the interface metric value to identify the priority
Get-NetIPInterface
3. In the above image, wifi has an interface metric of 40 whereas ethernet has 5. So ethernet has a higher priority over wifi. To change that we will assign wifi a metric of 4. The iFIndex refers to the interface index and in this case, for wifi, it is 7.
Set-NetIPInterface -InterfaceIndex 7 -InterfaceMetric 4
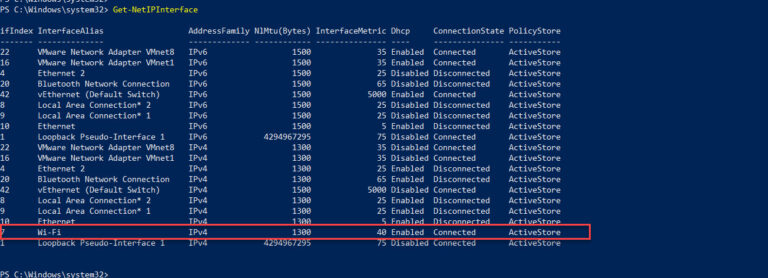
4. We will check if the value changed.
5. To change back to the original behavior where Windows will decide the priority, we have to enable automatic.
Set-NetIPInterface -InterfaceIndex 7 -AutomaticMetric enabled
6. In the image below, we can confirm that the metric changed to 40
Change network adapter priorities using GUI
To change the priorities using GUI do the following:
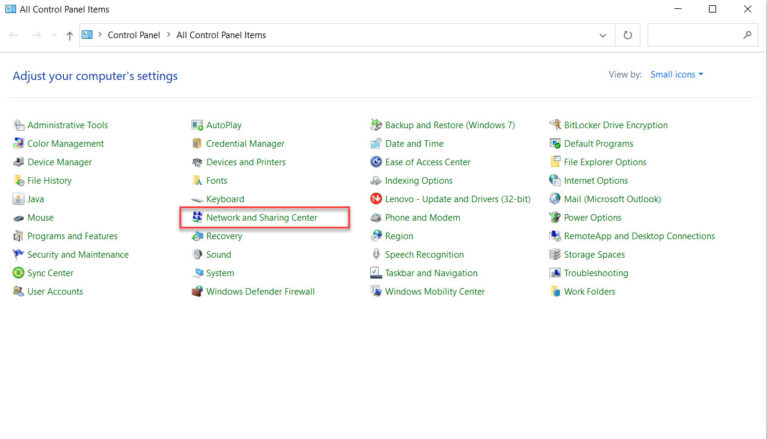
1. Open control panel
2. Click on network and sharing center.
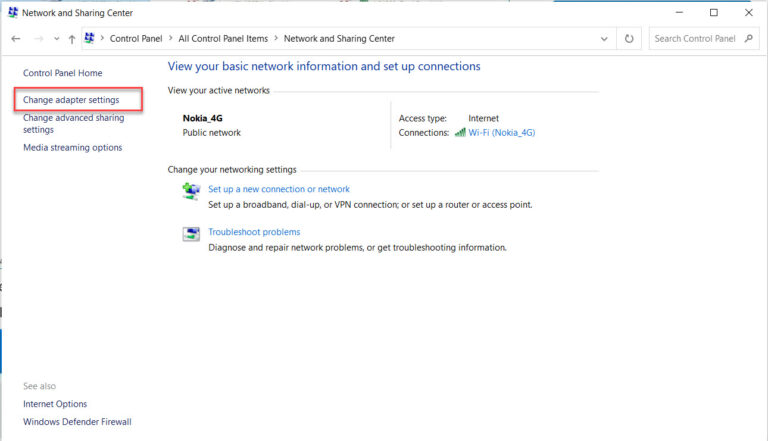
3. Click on change adapter setting
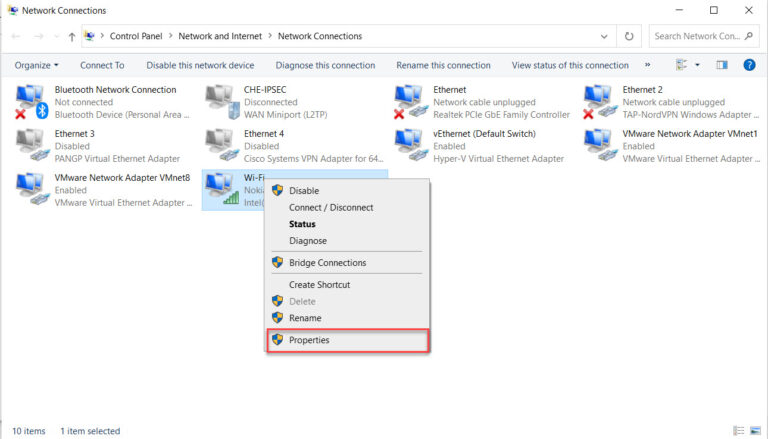
4. Right-click on wifi and open properties.
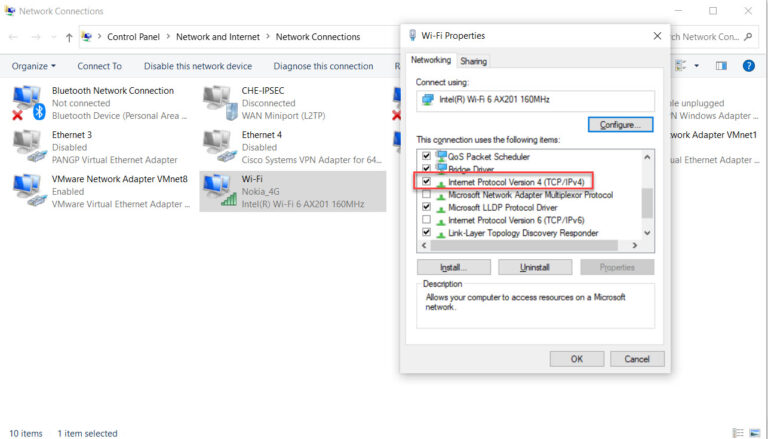
5. Choose IPv4
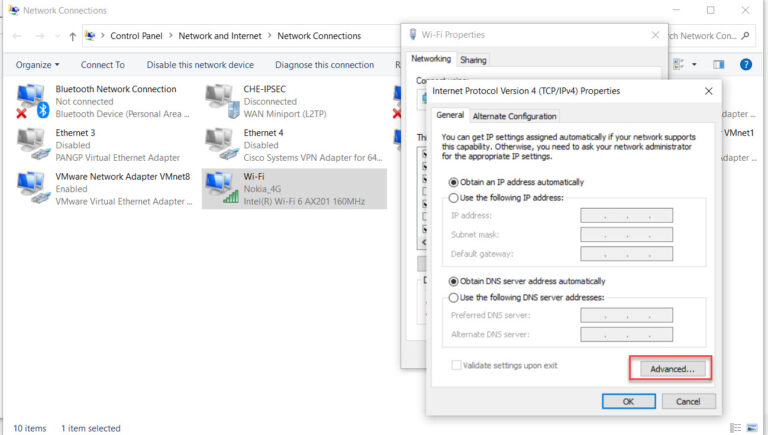
6. Click on advanced
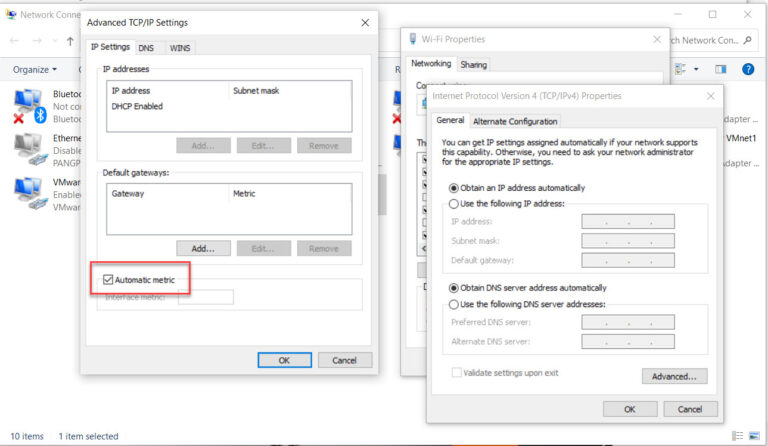
7. Uncheck Automatic metric
8. In this example, we are just changing the metric of wifi and assigning 4.
9. We have to follow the same steps and choose ethernet to change the ethernet interface metric.
- KB170108


