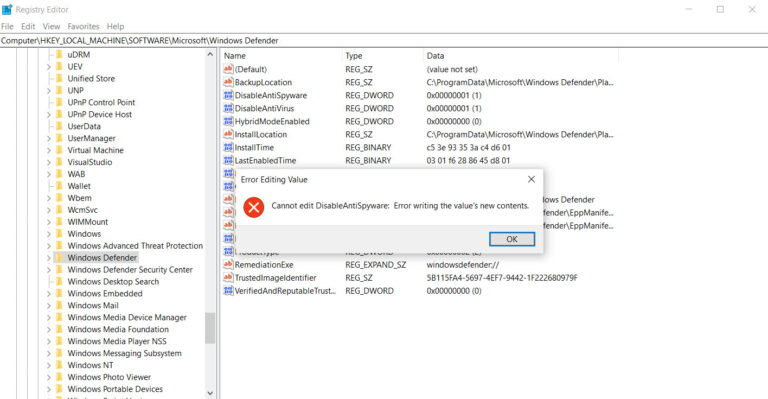
Windows Registry allows us to make changes to the Windows system by editing it. However many times we run into a situation where Microsoft doesn’t allow us to edit the keys. It gives an error saying “cannot edit – error writing the value’s new contents”. This happens when the user doesn’t have permission to make changes. And in many cases the default permission is assigned to the system or trusted installer. This can be resolved by granting the user proper permissions.
The registry editor should be used diligently and avoid making any unnecessary changes. As it makes the system inoperable. As a best practice always back up the registry before making any changes. In this case, we are using Windows 10 in a standalone mode and updating the HKLM – Windows Defender keys in the following path – Computer\HKEY_LOCAL_MACHINE\SOFTWARE\Microsoft\Windows Defender
Changing permission of the Windows Registry keys
Search and click regedit.exe, this will open the windows registry editor.
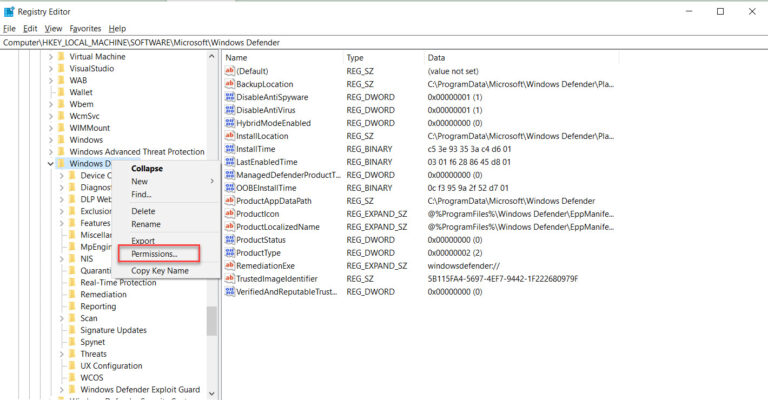
In Registry Editor, right-click the key that we want to edit and then click “Permissions” from the context menu.
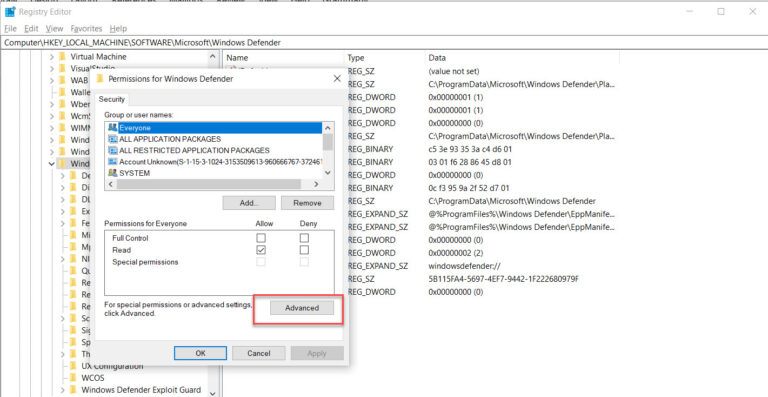
In the next pop-up choose the “advanced” option
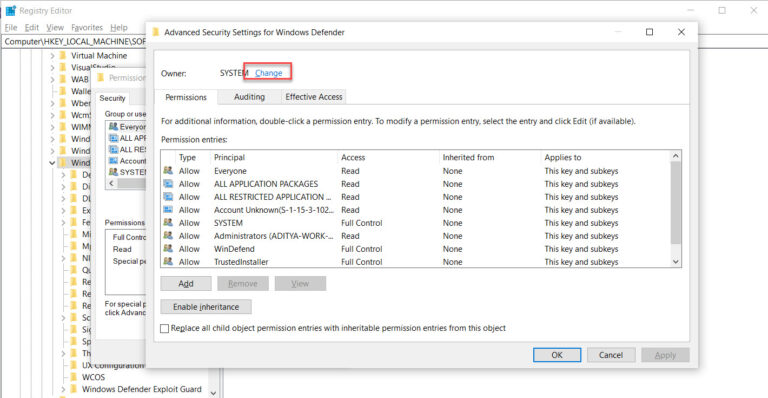
We will change the ownership, and in this case, we will change ownership to the local administrator user by clicking on change.
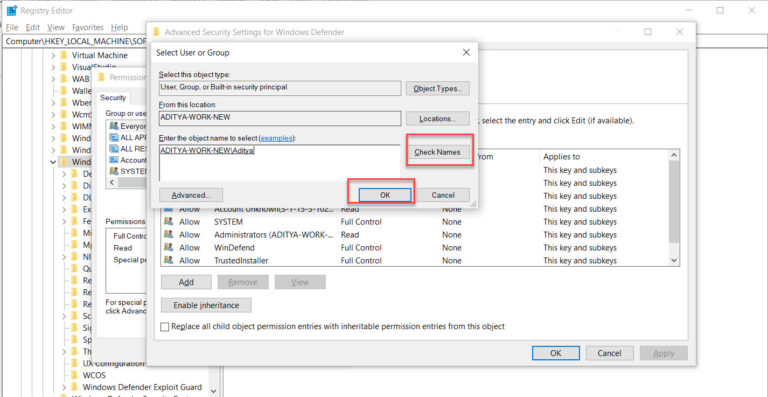
In the “Select User or Group” window, and in the “Enter the object name to select” box, type the name of the Windows user account. Then click on “Check Names” button to validate the account name. In this case, I will choose my account. When that’s done, click OK to close the “Select User or Group” window. And then click Apply and OK again to close the “Advanced Security Settings” window.
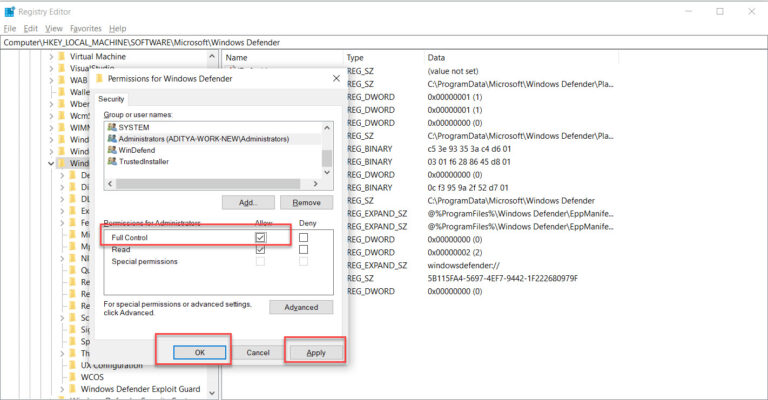
In the “security window” click on allow the user full control, click apply and save it. In my case, I’m giving myself full permission.
Now once this process is done we should be able to make changes to the concerned registry keys to which we have taken ownership.
- KB170110


