Microsoft Hyper-V can be enabled on desktops running Windows 10,11, or on Windows Servers. Here we will enable it on Windows 10 enterprise. On servers, it can be enabled using server manager.
How to add Hyper-V and create virtual machines
Prerequisites:
1. Windows 10 Enterprise, Pro, or Education. Windows 10 home is not supported.
2. BIOS-level hardware virtualization support
3. Enough RAM to run the VM along with the windows machine
Adding the Hyper-V role on Windows using programs and features
1. Right-click on the Start menu.
2. Click run
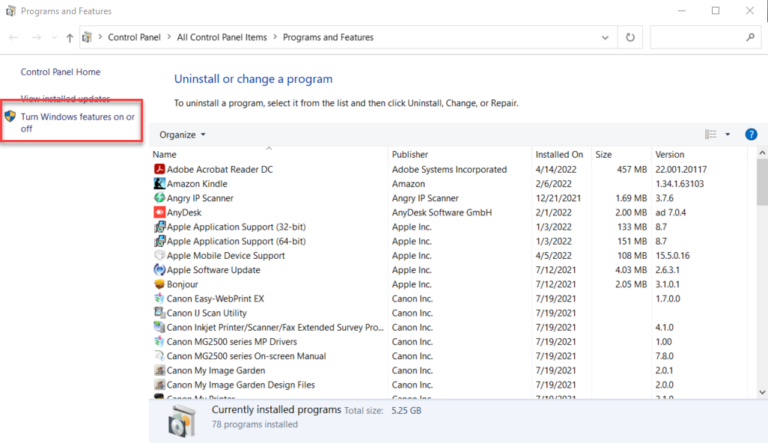
3. Type appwiz.cpl and press ok. A pop-up of the program and features will open.
4. Click Turn Windows features on or off
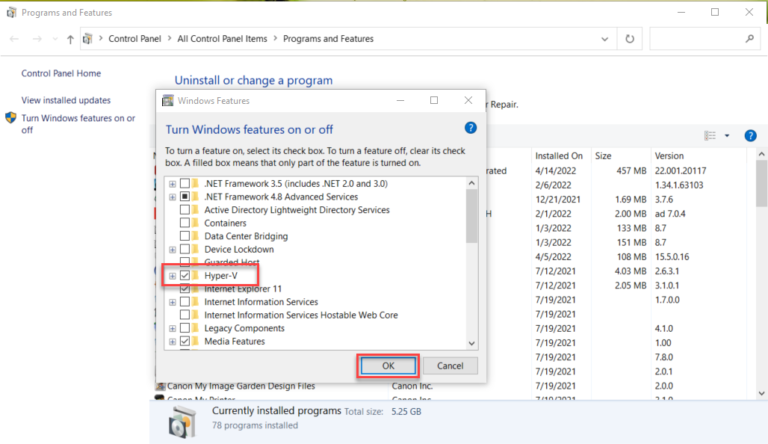
5. From the list check Hyper-V and click ok.
6. Reboot the system
Adding the Hyper-V role on Windows using Powershell
1. Open a PowerShell console as Administrator.
2. Run the following command:
Enable-WindowsOptionalFeature -Online -FeatureName Microsoft-Hyper-V -All
Adding a virtual machine with a Hyper-V manager
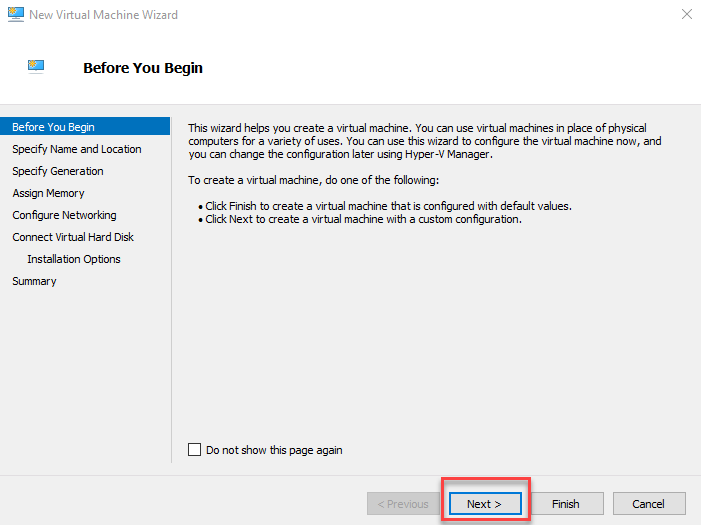
1. In Hyper-V Manager, click Action > New > Virtual Machine to start the wizard.
2. Review and click Next
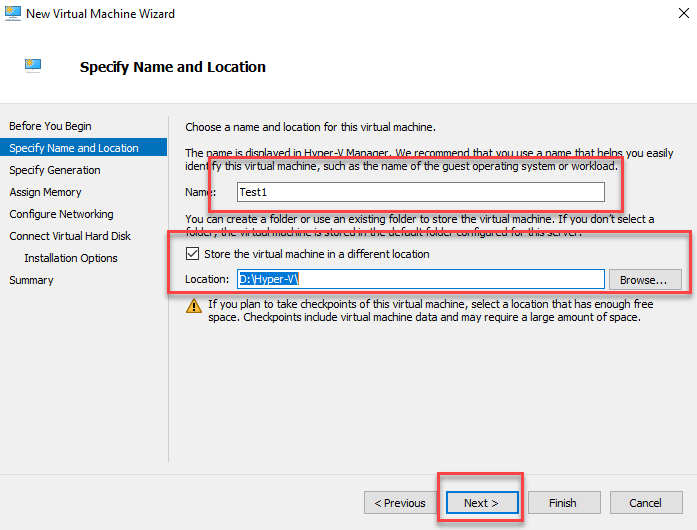
3. Specify Name and location, and browse where we want to save.
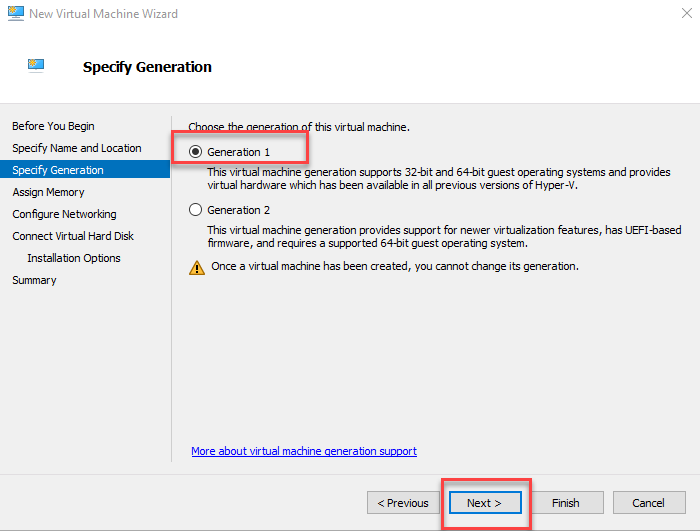
4. Select the generation based on the OS to be installed.
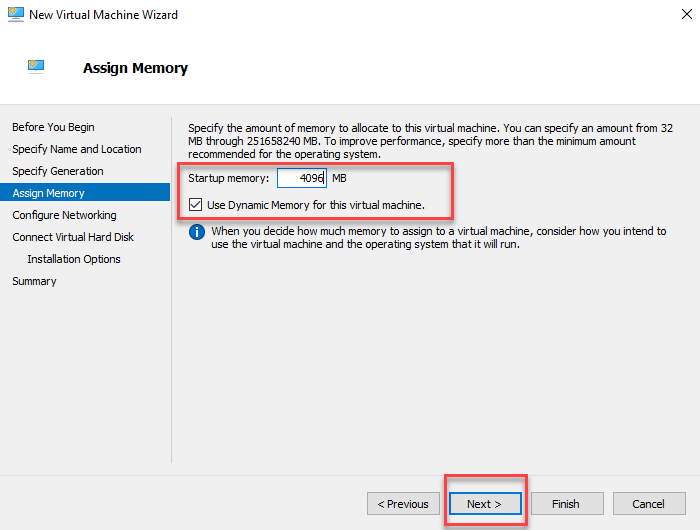
5. Assign memory, in this case, we chose 4096 MB and check the use of dynamic memory, to dynamically allocate more memory if needed.
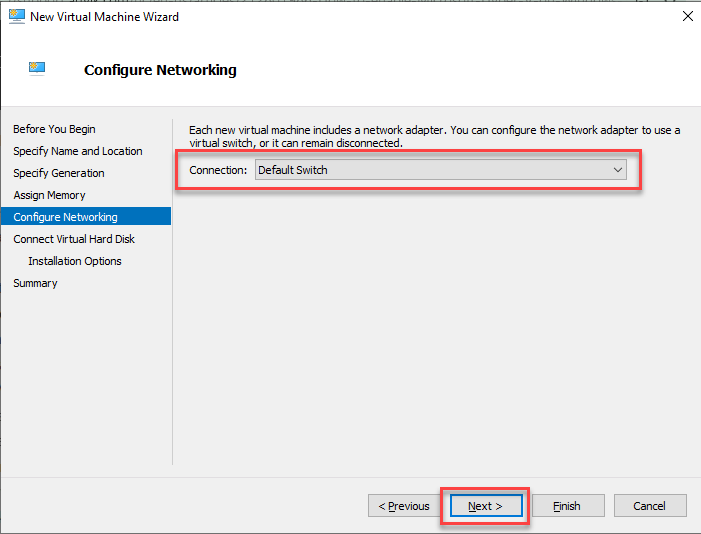
6. In the networking option, we will choose the default switch which gives access to the host network using NAT.
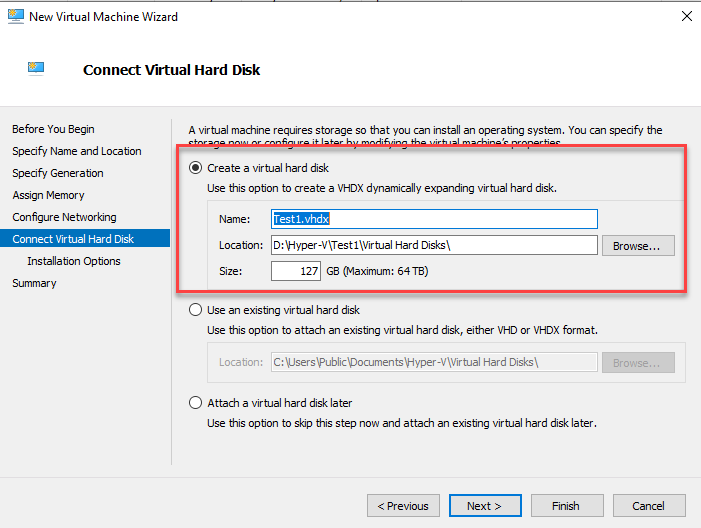
7. Name the Virtual, choose the size and location.
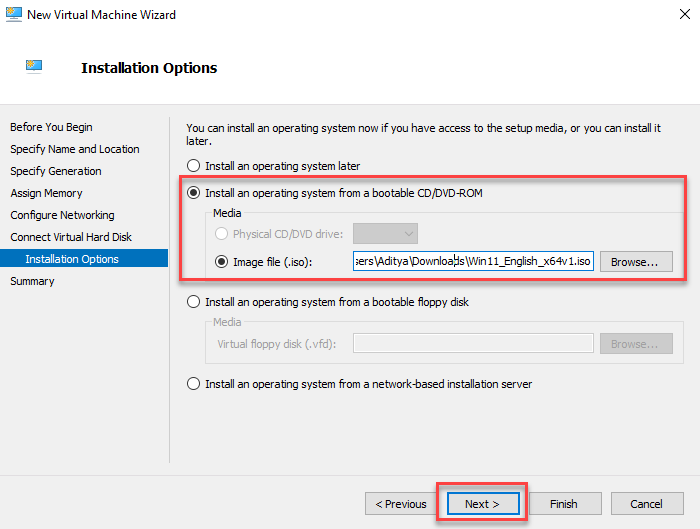
8. In the installation option, browse the location of the iso file.
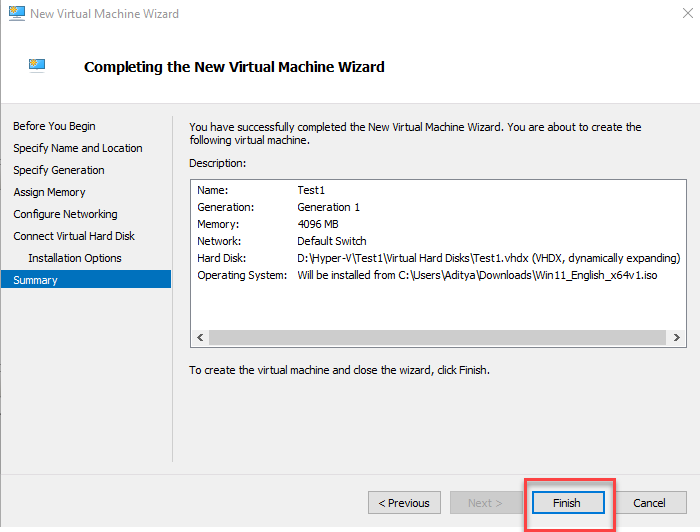
9. At last, review all the options and click finish.
10. After that, we will power on the virtual machine to complete the OS installation.
- KB170111


