Table of Contents
What is Microsoft Defender for Office 365
Microsoft Defender for Office 365 previously known as “Office 365 Advanced Threat Protection” or “Office 365 ATP” is a comprehensive cloud-based security solution provided by Microsoft. Defender for Office 365 combines threat intelligence, machine learning, and behavioral analytics to detect and respond to advanced threats that may target these cloud services. It protects against various types of security risks, including malware, viruses, phishing attempts, spam emails, malicious links, and other forms of cyber threats.
The key features of Microsoft Defender for Office 365 include:
- Threat Protection: It scans emails, attachments, links, and collaboration tools in real-time to identify and block known and emerging threats.
- Anti-Phishing: It helps detect and block phishing attempts by analyzing URLs, email content, and sender reputation.
- Safe Attachments: It examines email attachments in a sandbox environment to detect and block malicious content before it reaches the user’s mailbox.
- Safe Links: It checks URLs in emails and documents to determine if they lead to malicious websites, preventing users from accessing potentially harmful content.
- Anti-Spam: It filters out spam emails, reducing unwanted clutter in users’ inboxes.
Licensing requirement:
To implement Microsoft Defender for Office 365 we need additional licenses. There are three types of available licenses to implement Microsoft Defender for Office 365 –
- Defender for Office 365 Plan 1
- Defender for Office 365 Plan 2
- Microsoft 365 A5/E5/F5/G5 Security
Defender for Office 365 Plan 1 provides configuration, protection, and detection capabilities like anti-phishing protection, safe attachments, safe links, and safe attachments for SharePoint, OneDrive, and Teams.
Defender for Office 365 Plan 2 includes all capabilities of Defender for Office 365 Plan 1 plus additional capabilities like threat trackers, threat explorers, and automated investigation and response.
Microsoft Defender for Office 365 Plan 1 and Defender for Office 365 Plan 2 are each available as an add-on for certain subscriptions. Microsoft Defender for Office 365 Plan 2 is included in Office 365 E5, Office 365 A5, and Microsoft 365 E5. Microsoft Defender for Office 365 Plan 1 is included in Microsoft 365 Business Premium. For more information please check here and for the service description please check here.
Component of Microsoft Defender
Microsoft Defender is a suite of security products and services developed by Microsoft to provide protection against various types of threats across different platforms and environments. Microsoft Defender includes the following suite:
- Microsoft Defender for Endpoint
- Microsoft Defender for Office 365
- Microsoft Defender for Identity
- Microsoft Defender for Cloud Apps
- Microsoft Defender Vulnerability Management
- Azure Active Directory Identity Protection
- Microsoft Data Loss Prevention
- App Governance
For more information please check here.
Configuration of Microsoft Defender for O365
To configure Microsoft Defender for O365 you need to be a global administrator and audit logging must be turned on. Audit logging can be verified using the following command:
Get-AdminAuditLogConfig | Format-List UnifiedAuditLogIngestionEnabled
If the output is false, then auditing is not turned on, but it can be enabled using the following command:
Set-AdminAuditLogConfig -UnifiedAuditLogIngestionEnabled $true
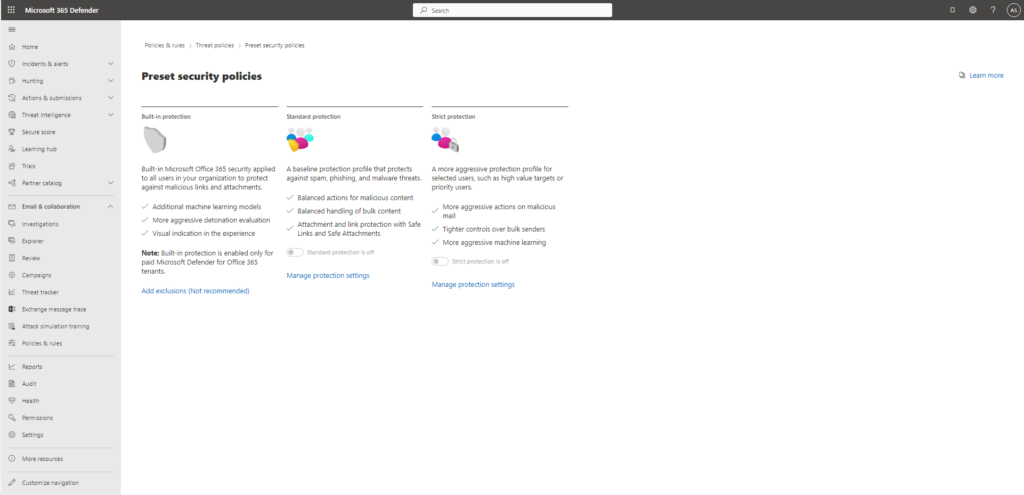
The default setup can be done using the preset security policies which cannot be customized. The settings are based on the observations of Microsoft – https://security.microsoft.com/presetSecurityPolicies
The custom setup can be divided into the following parts:
Configure Anti-malware protection in EOP
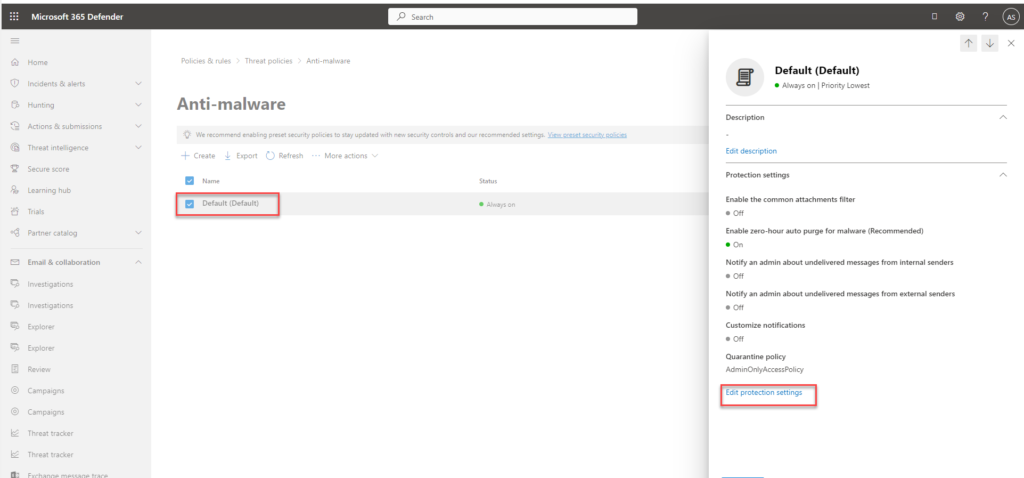
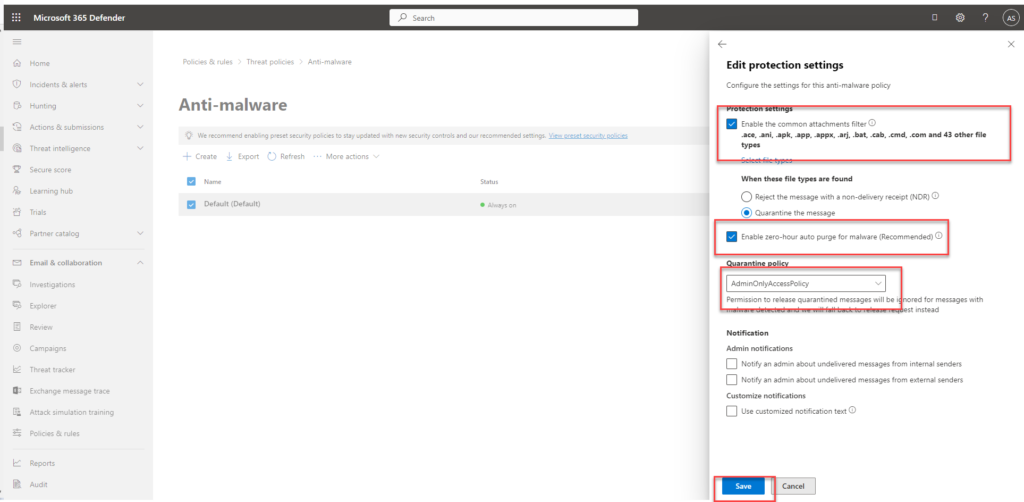
Anti-malware setting does not need an additional license as it is included in Exchange Online Protection (EOP). To configure it, open the anti-malware settings – https://security.microsoft.com/antimalwarev2. Click on the default settings and then edit to update the settings
- Enable a common attachment filter and customize the file type if needed.
- Enable zero-hour auto purge – this will quarantine malware
- Leave the default value AdminOnlyAccessPolicy selected for the quarantine policy
- We can keep the notification settings unchecked and then save it.
Configure Anti-phishing protection in Defender for Office 365
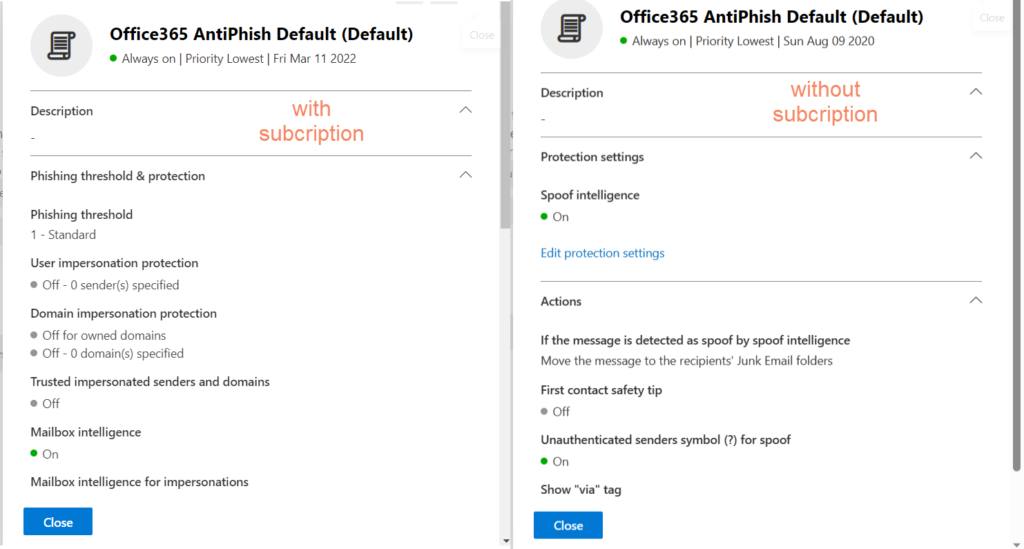
This setting requires a license for advanced set-up. See below the difference in the settings.
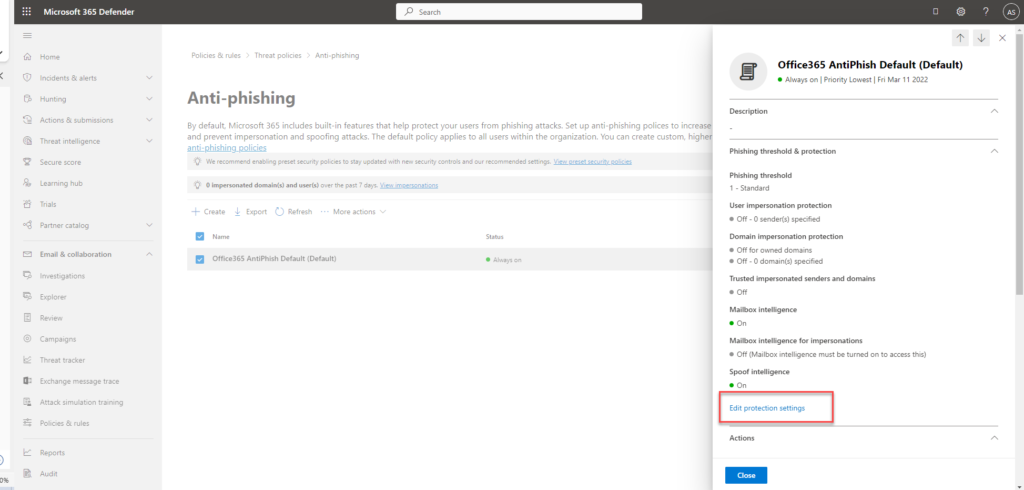
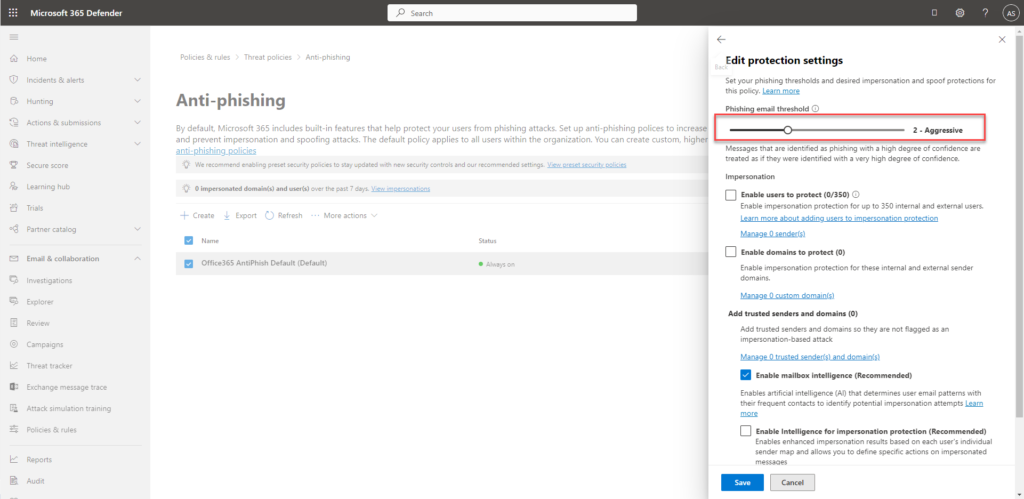
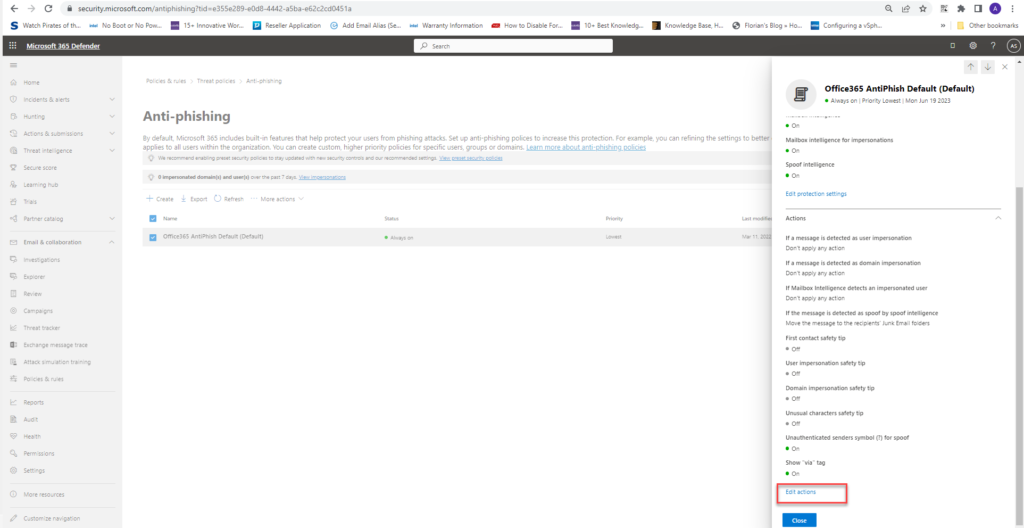
Open the antiphishing page – https://security.microsoft.com/antiphishing. And click on the default settings and click edit protection settings and then make the following changes
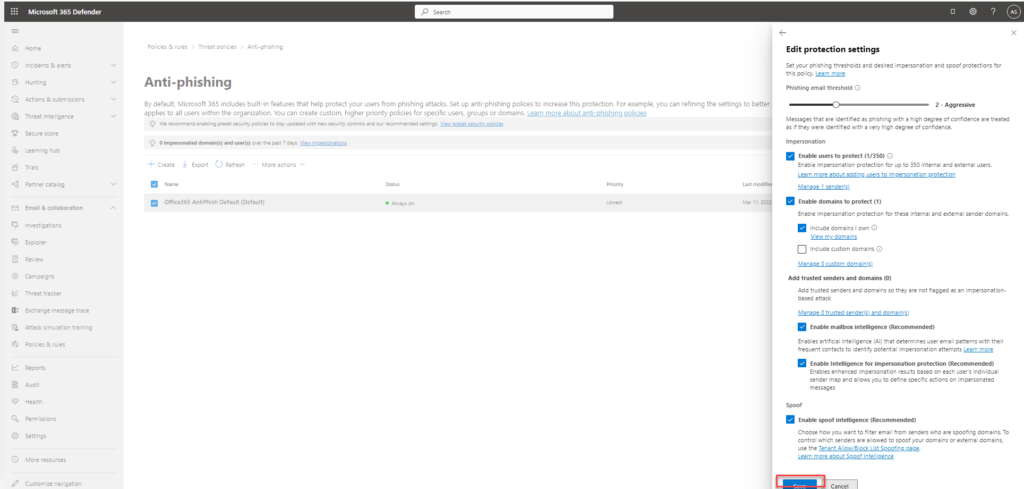
- Set phishing email threshold as aggressive
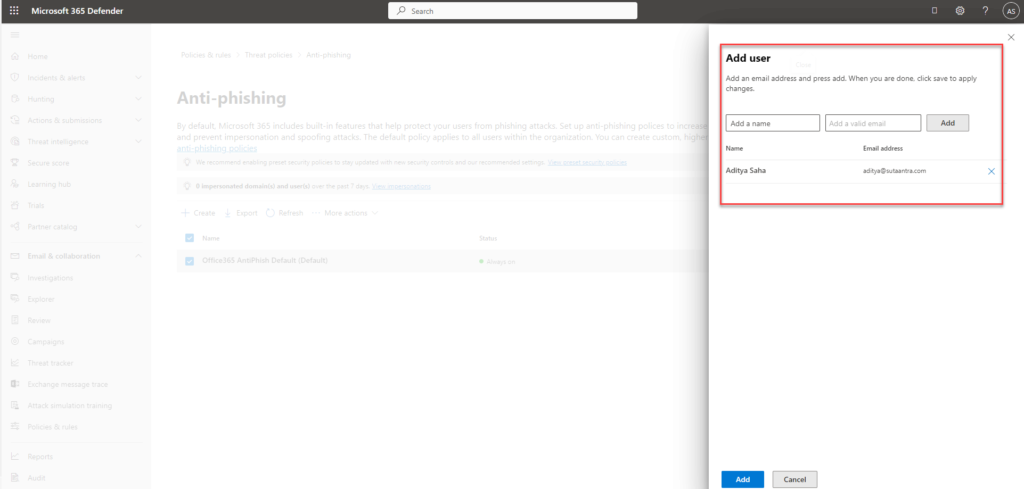
- Impersonation section – enable users to protect and add the users
- Enable domain to protect and include my domain
- Check – enable mailbox intelligence
- Check – enable intelligence for impersonation protection
- Check – enable spoof intelligence
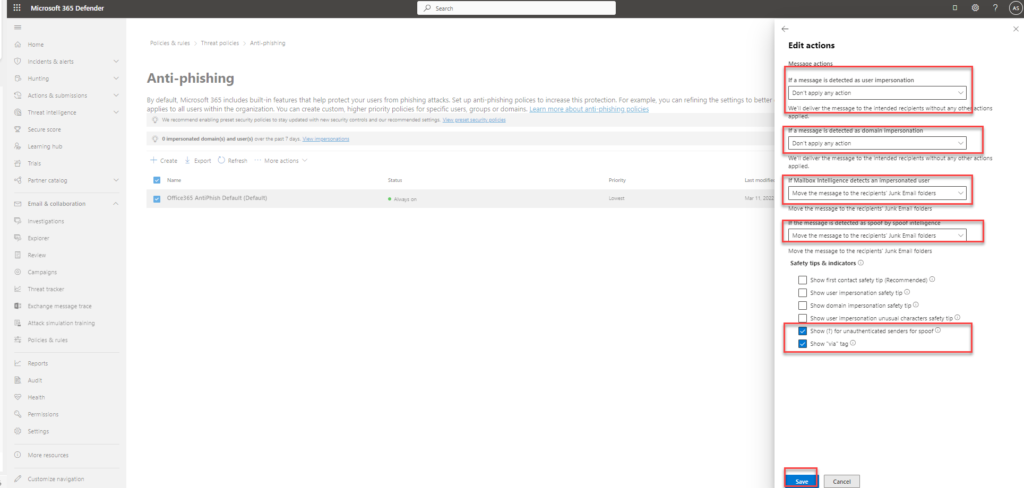
In the next step, we will configure the action for the above settings. Click on edit actions and make the following changes
- If a message is detected as user impersonation – don’t apply any action –this will use the default quarantine policy
- If a message is detected as domain impersonation – don’t apply any action – this will use the default quarantine policy
- If Mailbox Intelligence detects an impersonated user – move the message to the recipient’s junk folder
- If the message is detected as spoof by spoof intelligence – move the message to the recipient’s junk folder
- Default check – show (?) for unauthenticated senders for spoof
- Default check – show ‘via’tag
Configure Anti-spam protection in EOP
The antispam policy can be accessed here – https://security.microsoft.com/antispam. We will keep the default policy.
Configure Safe Attachments policies in Microsoft Defender for Office 365
This setting requires a license for set-up. Open the Safe Attachments page in the Microsoft 365 Defender portal at https://security.microsoft.com/safeattachmentv2
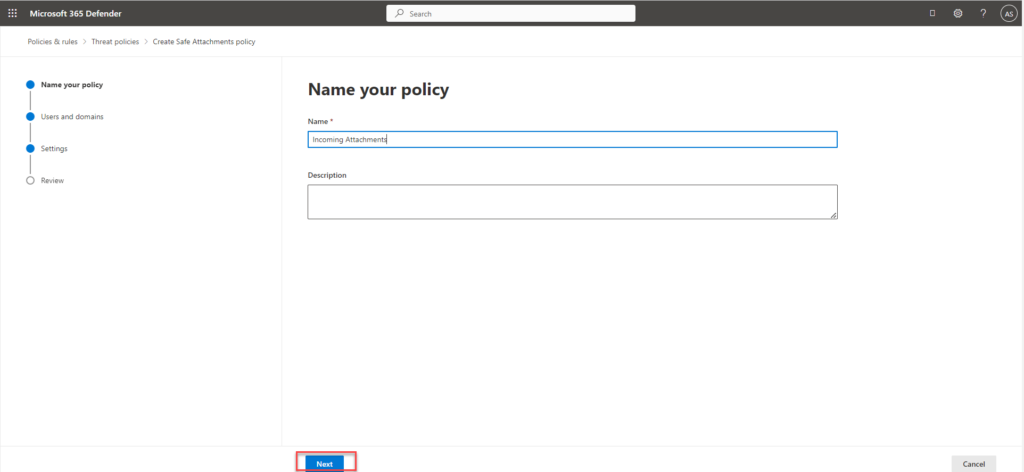
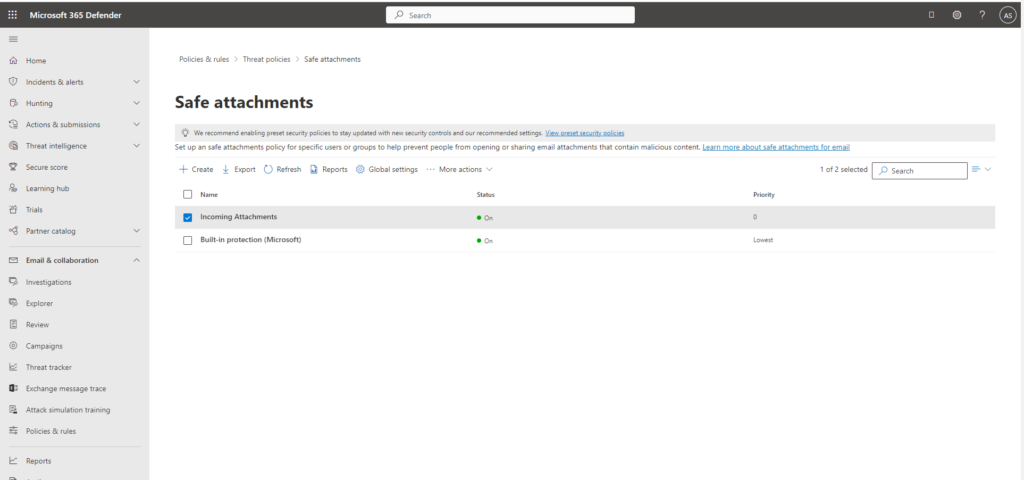
The Built-in protection (Microsoft) policy is created by default by Microsoft. We can use the default one or create a new one. Here we will create another policy and start by clicking create:
- Name the policy – Incoming attachments and click next
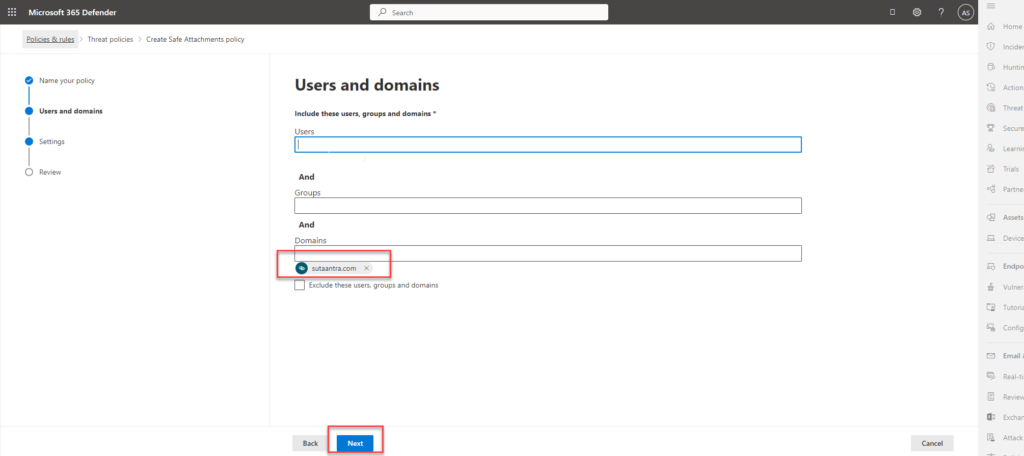
- Add accepted domains as needed and click next
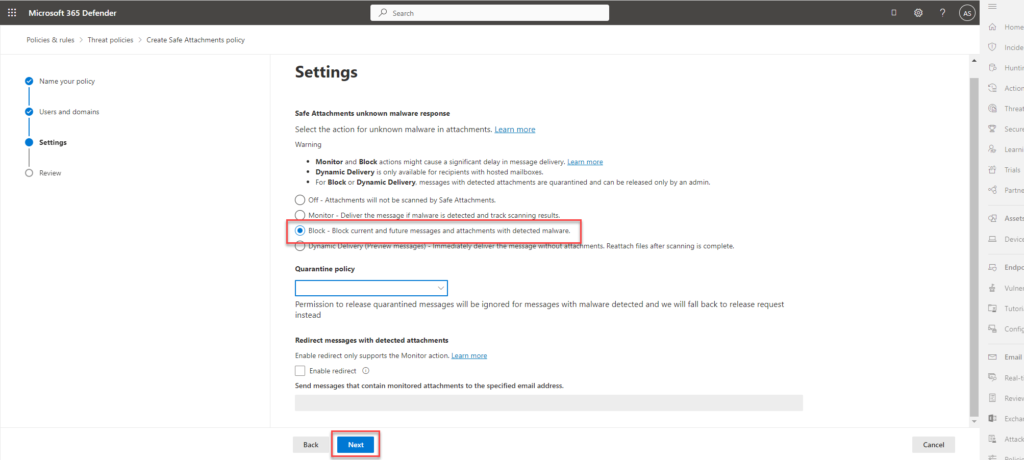
- Select block current and future messages and attachments with detected malware.
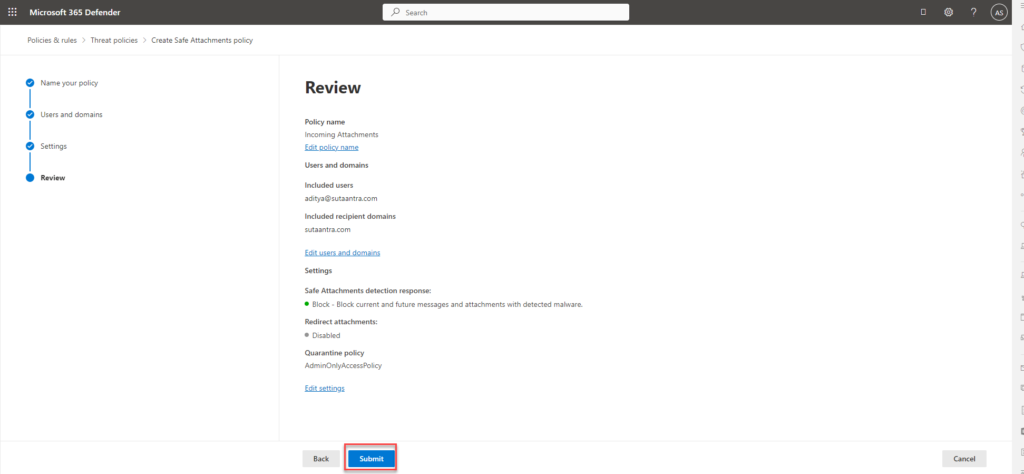
- Review and then submit.
Configure Safe Links policies in Microsoft Defender for Office 365
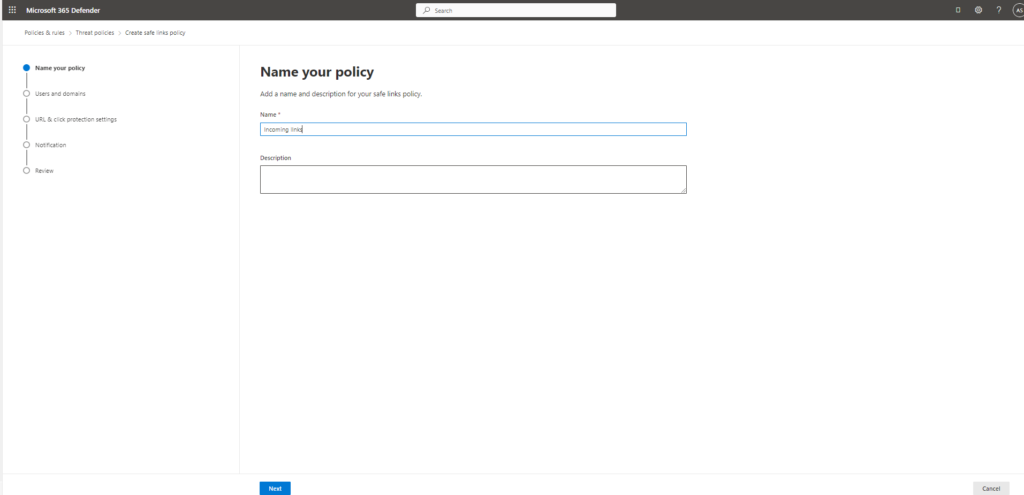
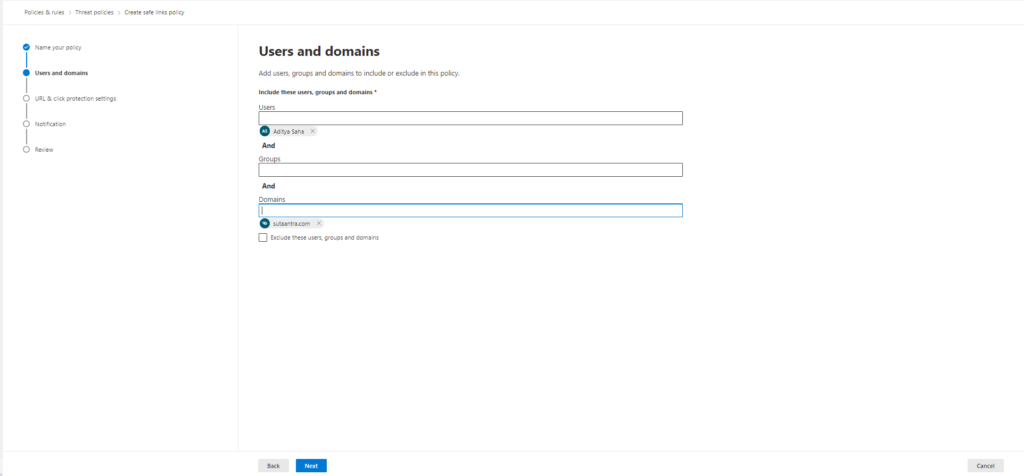
This setting requires a license for set-up. Open the Safe link page in the Microsoft 365 Defender portal at https://security.microsoft.com/safelinksv2. We can use the default Built-in protection(Microsoft) or create a new one by clicking create
- Name the policy – Incoming link and click next
- Add accepted domains as needed and click next
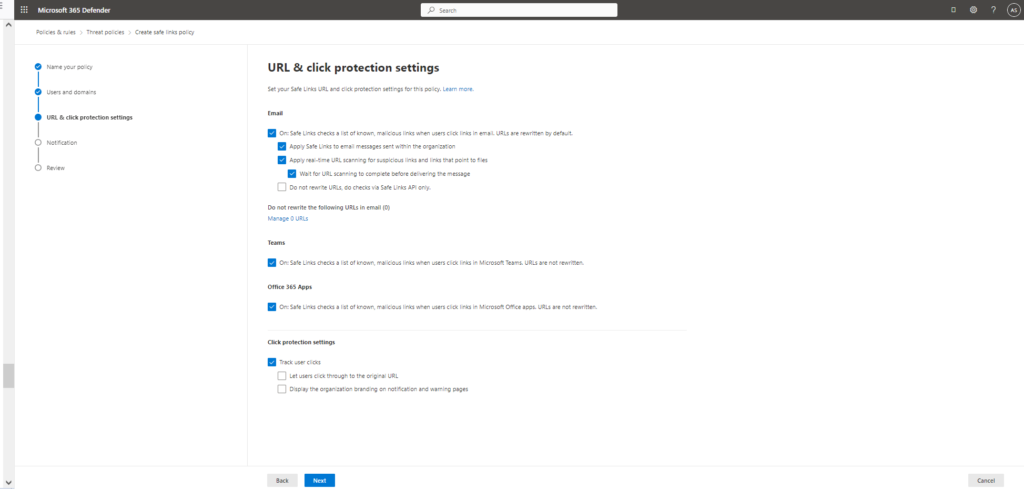
- Url & click protection settings turn the following settings on
- On: Safe Links checks a list of known, malicious links when users click links in email: Select his setting (turn on)
- Apply Safe Links to email messages sent within the organization: Select this setting (turn on).
- Apply real-time URL scanning for suspicious links and links that point to files: Select this setting (turn on).
- Wait for URL scanning to complete before delivering the message: Select this setting (turn on).
- On: Safe Links checks a list of known, malicious links when users click links in Microsoft Teams: Select this setting (turn on).
- On: Safe Links checks a list of known, malicious links when users click links in Microsoft Office apps Select this setting (turn on).
- Track user clicks
This completes the set-up.
- KB170121


