Many a time a user mailbox reaches 100Gb in O365 and that’s the maximum allowable size. In that case, either the mailbox is cleaned or we end up setting up archiving of older emails based on MRM.
Table of Contents
What is MRM, Retention Tags, Retention Policy?
Messaging Records Management (MRM) is a way to manage emails and messages in O365 to comply with company policy or legal needs. It is achieved by using Retention Tags and Retention Policies.
Retention tags specify how long a message is kept and what action is taken after reaching the retention age. It is linked to a retention policy.
A Retention Policy is a method of applying a group of retention tags to a mailbox. A mailbox can have only one retention policy applied, however, multiple tags can be linked or unlinked from a policy.
In O365 there is a default MRM policy that is applied when we enable archiving. It moves any email older than 2 years to the archive mailbox.
How to create a new retention tag & retention policy
1. Log in to Classic Exchange admin center
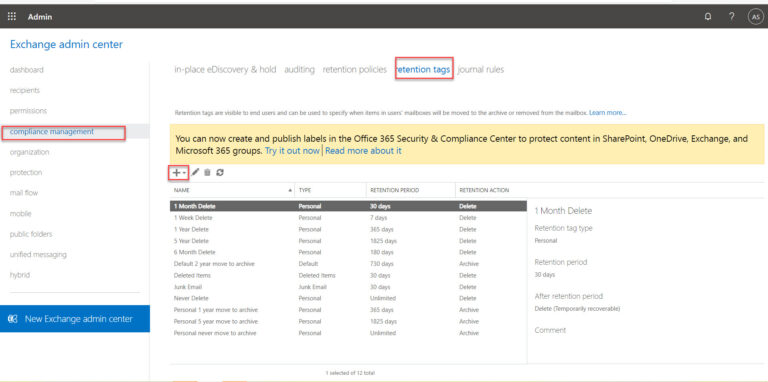
2. Navigate to Compliance Management, then to the retention tags tab, and click on the + sign.
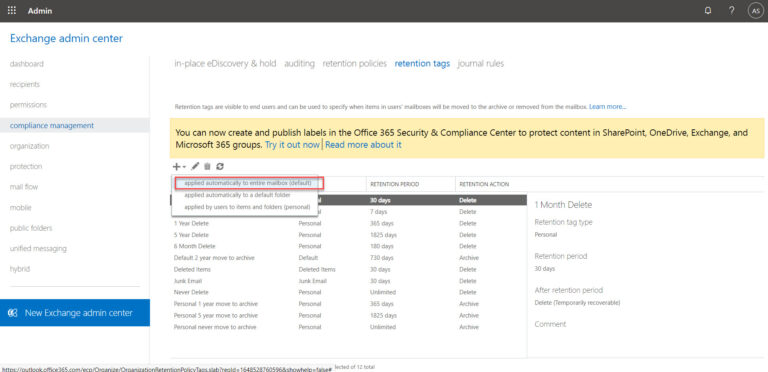
3. Choose applied automatically to the entire mailbox
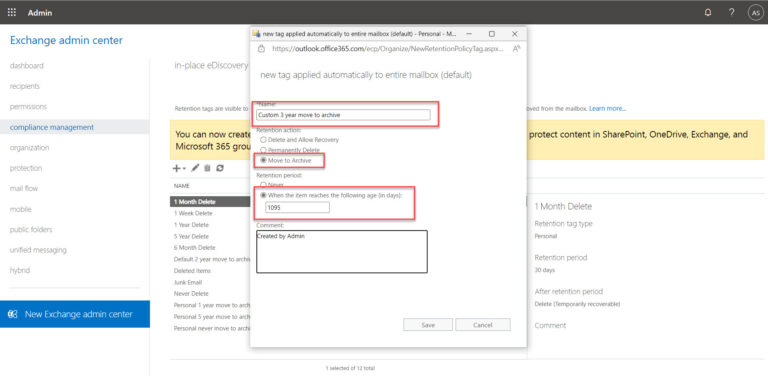
4. Fill up the details – name/retention action/retention period and save it. In this case, I wanted to create custom retention tags for archiving after 3 years.
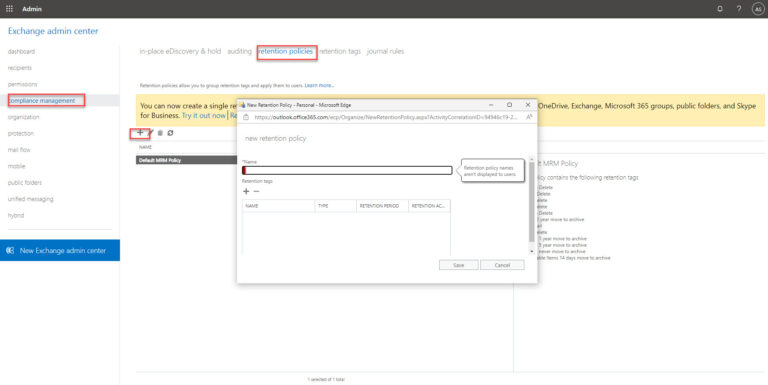
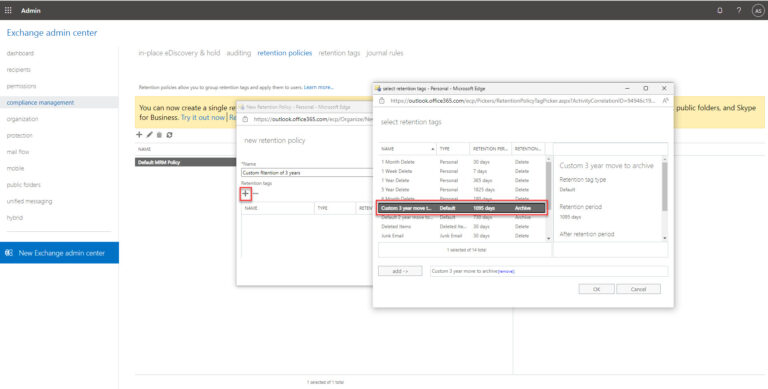
5. Next, we will create a retention policy by clicking on the + sign in the retention policy tab.
6. Name it, add the retention tag and save it.
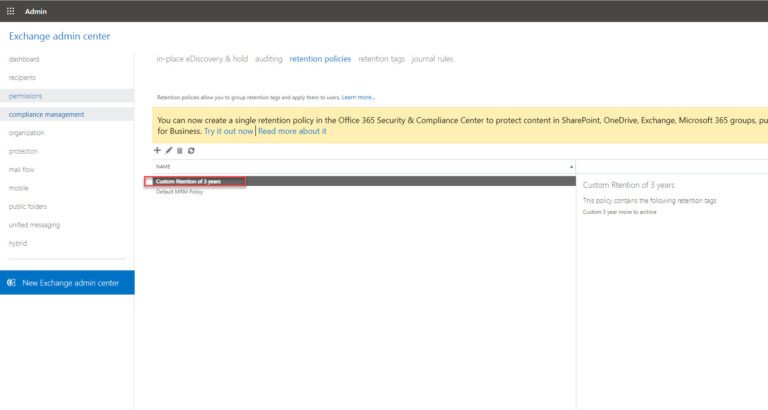
7. It should look like the below.
Applying the retention policy to a mailbox
1. Log in to Classic Exchange admin center
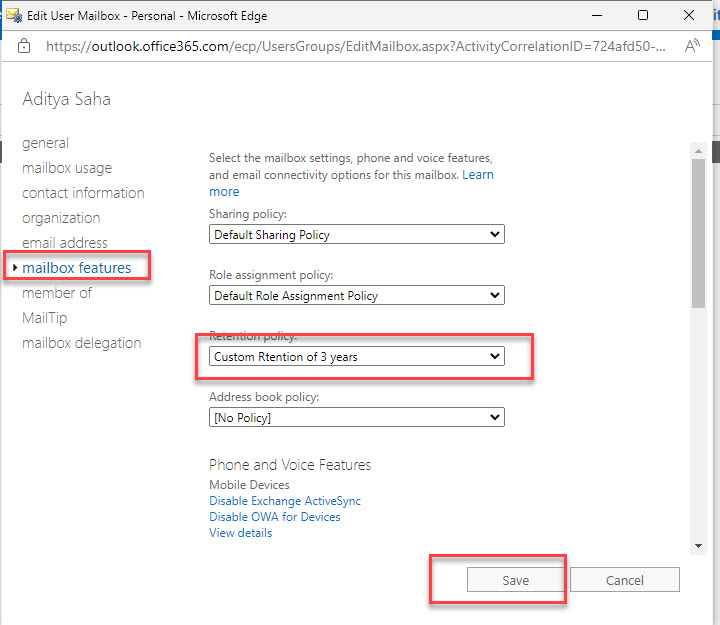
2. Navigate to mailboxes and chose the desired mailbox & click mailbox features.
3. Edit and update the retention policy to the desired policy and save it. In our case, we will update it to the custom 3-year retention policy.
We can also set the retention policy using Powershell:
Set-Mailbox "Aditya" -RetentionPolicy "Custom retention of 3 years"
Enabling archiving for the mailbox.
Online archiving can be enabled for any type of mailboxes. However, an account with a mailbox of Exchange online plan 1 needs an add-on license whereas Exchange online plan 2 already includes that. For more information please check the link here.
1. Log in to Classic Exchange admin center
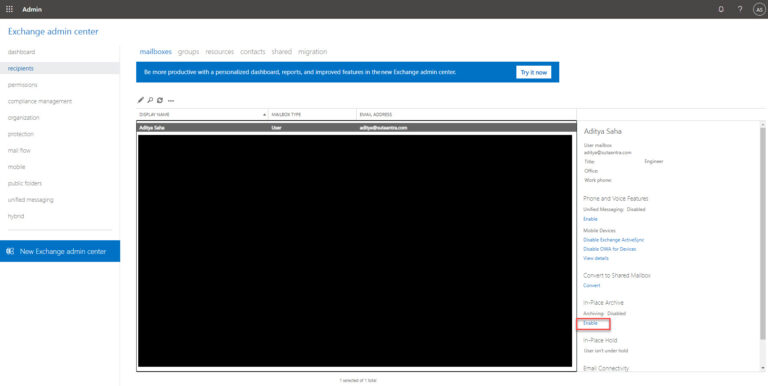
2. Navigate to the mailbox and enable in-place archiving. Confirm the pop-up and done.
Archiving can also be done from the New Exchange admin center in compliance. Navigate to Information governance. Then to the archive tab and enable archiving.
Archiving can also be done using Powershell.
Enable-Mailbox -Identity aditya@sutaantra.com -Archive
Once we enable the archive a new archiving mailbox of 100GB is created. If we disable the archive we have 30 days to re-enable it or else all the data of the archive mailbox is lost.
Once the storage limit to 100GB is reached there is a option to auto-expanding archiving upto 1.5TB. For more information pls check here.
Viewing of the online archive
The online archive can be viewed in outlook on the web or owa. However, all versions of Outlook don’t support viewing an online archive. To check which versions of Outlook support viewing of the online archive, please check the link here.
- KB170107


